IK Multimedia iRig Keys – MIDI keyboard for PC, Mac, iOS and Android

MIDI keyboard IK Multimedia iRig Keys with iPad

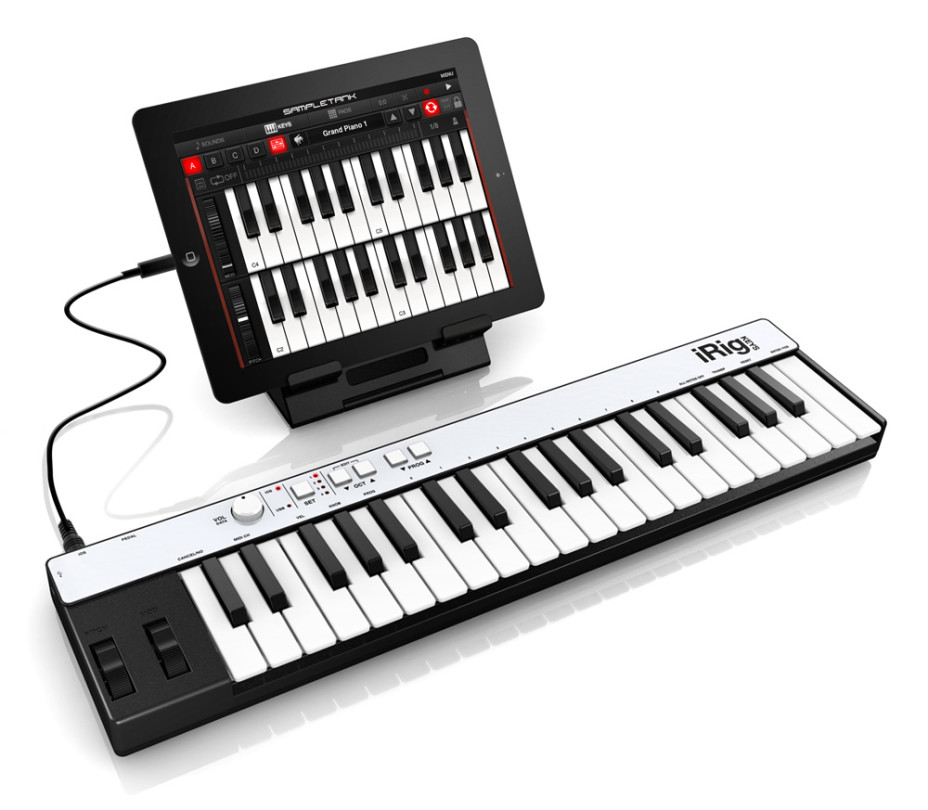
In audio part today we will meet with IK Multimedia iRig KeysMIDI keyboard, which is oriented on work with different devices : PC, Mac, iOS and Android. It has 37 velocity-sensitive mini-keys; pitch bend and modulation wheels; volume control knob, which can be programmed to control custom parameter; octaves control buttons, which can be programmed; 4 buttons for storing and restoring of parameters sets; and sustain or expression pedal input. MIDI keyboard is connected to devices via Core MIDI interface ( for iOS ) or via USB interface ( for PC and Mac ), it is powered from these connections. Also, it can be used with Android devices via OTG to Micro-USB adapter, which is bundled with controller. Keyboard is supplied with following software : SampleTank FREE iOS and iGrand Piano FREE for iOS ( they can be downloaded from Apple App Store ); iGrand Piano FREE and iLectric Piano FREE for Android ( they can be downloaded from Google Play or Samsung Galaxy Apps ); SampleTank 3 SE for PC and Mac ( they can be downloaded from manufacturer’s web-site after registration ); and The Grid plus 5 Beats and Elektronika virtual instruments for SampleTank 3 SE ( they are also can be downloaded from manufacturer’s web-site ). This is interesting MIDI keyboard model, which has small sizes and weight and ability to work with different devices; its minuses are : lack of drumpads, small amount of programmable buttons for DAW control and small keys size ( but this is the consequence of its compact sizes ). So, this device should be bought only if there will be no need in additional controls; but, if there is need to simply buy MIDI keyboard, then it is better to buy more functional device, which costs the same amount of money or not much more.

Review of functional MIDI keyboard Alesis V61

MIDI keyboard Alesis V61

Lets review functional MIDI keyboard Alesis V61. It has 61 full-size keys, which react on pess velocity; octave up and down buttons; 4 programmable buttons and 4 programmable knobs; 8 drun pads, which react on presses velocity and applied force; and pitch bend and modulation wheels. All additional controls have variable back-light, which shows their activity degree. Controller is connected to computer via USB port ( through which it also receives power ) and is automatically recognized by Windows and Mac OS X operating systems, in which it can integrate with modern DAWs : Avid Pro Tools, Ableton Live, Steinberg Cubase, FL Studio, Cackewalk Sonar, REAPER and others. Alesis V61 is bundled with DAW Ableton Live Lite 9 and multifunctional instrument AIR Music Tech Xpand!2. There is also need to note compact design of MIDI keyboard and its adequate price ( 169 USD at the middle of Autumn 2015 ) in comparison with other MIDI controllers.

Novation Launchkey 49 – professional MIDI keyboard with tight integration with DAWs

Professional MIDI keyboard Novation Launchkey 49

Todays audio part will be dedicated to professional MIDI keyboard Novation Launchkey 49. It has 49 velocity-sensitive keys; 16 drum-pads with RGB backlight, which are also velocity-sensitive; 8 knobs; 9 sliders; pitch bend and modulation wheels; 2 octave/transpose buttons; 1 LED display; 2 Track/MIDI Channel buttons; 8 mute/solo tracks buttons; 3 InControl buttons; 2 RGB backlit buttons; 6.3 mm ( 1/4” ) TRS jack input for sustain pedal; and Kensington Lock port. Keyboard can be connected to computer via USB or MIDI port. In first case it receives power only from this connection; in the second – it requires additional power adapter input ( which is not supplied with device ). MIDI keyboard tightly integrates with DAWs Ableton Live and FL Studio, wherein it can work with other modern DAWs : Avid Pro Tools, Steinberg Cubase, Cackewalk Sonar, REAPER and others. It is automatically set up, when connected to Windows or Mac OS based computers via Plug In and Play function. Novation Launchkey 49 package contains following software : DAW Ableton Live Lite, virtual instruments Novation Bass Station and Novation V-Station, and 1 GB of Loopmasters samples. For connection to iOS devices MIDI keyboard requires power adapter and camera connection kit, or special iOS USB camera adapter. Device sizes are : 775 ( length ) x 270 ( depth ) x 90 ( height ) mm.

M-Audio Keystation 49 II USB MIDI keyboard review

MIDI keyboard M-Audio Keystation 49 II USB

Today among audio devices we will look on MIDI keyboard M-Audio Keystation 49 II USB. It is DAW parameters controller and MIDI notes recording instrument. Overall process looks like so : human plays on this instrument and controls various parameters, they are recorded by DAW in MIDI editor, then they are played by software synthesizer. Keyboard has 49 full-size keys, which react on press velocity ( it is very useful, because many synthesizing parameters can be controlled with press velocity, this allows to perform these actions faster and more creatively ); has USB and MIDI connectors for communications with computer; is powered from 1 USB port; has different buttons and knobs for DAW parameters controlling; has small weight ( this is useful for its use on concerts ); and can be plugged to iOS devices via Apple iPad Camera Connection Kit adapter ( which is not bundled with MIDI keyboard ). With M-Audio Keystation 49 II USB controller following software is supplied : SONiVOX Eighty-Eight Ensemble – sample based synthesizer-emulator of piano 9-foot CD327 Steinway ( it has in itself recorded samples of this instrument, from which it can synthesize different sounds of this instrument ); DAW Ableton Live Lite; and multi-functional AIR Music Tech Xpand!2 synthesizer. Keyboard can work with Windows XP, Windows Vista, Windows 7, Windows 8 and Windows 10 and Mac OS X 10.5 and newer operating systems; it integrates very well with modern DAWs : FL Studio, Cackewalk Sonar, REAPER, Avid Pro Tools, Ableton Live, Steinberg Cubase and others.

Continuing acquaintance with DAW REAPER : studying VST, work with sounds and rhythm

VST options page of DAW REAPER

Lets continue our acquaintance with DAW REAPER : today we will learn VST ( Virtual Studio Technology – is a technology for plugins creation, which act as instruments, effects and processors, and for their unified connection to different DAWs and other programs ), work with recorded sounds and rhythm of composition. For this purpose we will create simple example, for rhythm we will use recorded sounds of snares and hats; simple melody we will create with use of VST synthesizer Genobazz 2, which was created by TEK’IT Audio. You should already have installed DAW REAPER, if you have some difficulties, you can write about them in comments, I’ll answer to you as soon as I’ll have free time. VST Genobazz 2 can be downloaded from Internet, it is a free plugin; you can find links to it in Google. It is distributed in form of executable installer; create somewhere VSTs folder, in which you’ll install plugins, they can be used by other DAWs also, so it is better to place it on path, that is accessible by all programs. Then install Genobazz 2 in this folder; then open options page in DAW REAPER Options -> Preferences ( this window can be seen on upper image ); choose VST in left list, add path to you VSTs folder in according field and press Clear cache/Rescan, so that DAW will find and install this plugin. Then download archive with project example and open it in REAPER.

DAW REAPER : Rhythm and basses

As it can be seen from the image, rhythm is created with use of recorded sounds ( they are located in project archive ). All sound files can be inserted into tracks by dragging and dropping them from Explorer into DAW, it will import and setup them by itself. Basses are synthesized with use of MIDI notes, for them I selected two sounds presets ( preset sound synthesis parameters ) of Genobazz 2 : Defaul and Acid Tweet Arp. VST plugins can be added to track by clicking on FX button; then on Add add button and by selection of VST ( for effects and processors ) or VSTi ( for instruments ). REAPER also supports other plugins formats and its own scripting language for sounds processing. Order of plugins matters, because sound signal is passed from current plugin to next one, this way sounds processing chains can be created, for example : synthesizer receives MIDI notes and generates sound, which later is processed by effects, so that needed sound will be obtained. VST plugins can be added to MIDI tracks and to tracks with recorded sounds. MIDI notes can be edited by double clicking on their panels in track; to the left on their editing windows musical keyboard is located, at the bottom part there is area in which other notes parameters can be edited, for example, velocity of keys pressing ( whether these additional parameters will be accounted by synthesizer : depends solely on itself ).

DAW REAPER VST Genobazz 2

This project example is very simple and there is ability to experiment with it, creating composition, which you like. For example, there is disabled track, which can be used to create rhythm with kicks and receive House music rythm; all in all, here is ability to unleash your imagination. That is it for today; if you have any questions, you can ask them in the comments, I’ll answer to them as soon as I’ll have free time for this. See you in the next article about DAW REAPER.

DAW REAPER MIDI notes editor

Introduction to DAW REAPER

DAW REAPER main window

Today we will meet with DAW ( Digital Audio Workstation ) REAPER. Unlike other modern DAWs, which are oriented on sleek design to motivate users to buy them and on semi-automatic performance of different actions, REAPER is more oriented on professional work with sound and provides functional instruments, which provide lots of possibilities and require understanding of what user is currently doing and some degree of technical education in this area. Because of this : from one side, this DAW is more difficult to study for novices, but from the other side, it provides lots of possibilities, which may be unaccessible in other studios due to semi-automatic nature of their instruments. REAPER can be downloaded and used for free for 60 days; after this period of time there is need to purchase program : at its startup pop up window appears, which asks to buy program, after 5 seconds it can be closed and no functions are restricted; but this program worth its money and should be bought according to license. It costs 60 or 225 USD, depending on usage scenarios; its site is located here : http://www.reaper.fm/ .

Lets briefly become acquainted with interface of program : in the central part there is tracks area, which allows to place sounds, MIDI notes, control automation of sounds, synthesizers, effects and other instruments and perform large amount of other operations; this is the main work area of program. To the left there is column with tracks handlers, which allow to control their volume, automation, switch on and off tracks, add instruments and effects to them and perform lots of other operations. Some tracks in this area can be made folders, which allow to group tracks and control them all and apply effects to all of them in bulk ( this also saves computer resources, because this way effects are applied to single track after mixing of all sounds into it, instead of application to each track individually ). At the bottom part of window there is mixer panel, which allows to control tracks parameters individually and set parameters of the whole composition. At the top part of window menu, buttons and hardware information reside.

There is ability to work with DAW this way : record sounds or use existing ones, place them on tracks or attach VST instruments to tracks and place there MIDI notes, which activate these instruments; then, when composition will be ready, it can be exported into lossless formats ( FLAC, WAV and others ) or lossy formats ( Ogg, MP3 and others ). Before actual composition creation, there is need to think about it and feel it, make plan and then implement it. If there is no complete picture of composition, there is ability to create parts of it and its story : rhythm parts, melody, pads, sounds effects and experiment with them, by changing them and moving them here and there until feeling will come. Periodically I’ll write articles about work with this DAW, with VST instruments and effects ( FM-synthesizers, compressors, distortion, delay and others ) and will publish little examples for you to study on them. Lets say in ahead, that I’m not professional musician and for me it is hobby and rest after work, but I know how to work with this DAW ( there is not big amount of information of work with it ) and have knowledge of technical aspects of electronic music and can share my knowledge and experience and at the same time learn something by myself. Thats is all for today, see you in the next articles.