Continuing acquaintance with DAW REAPER : studying VST, work with sounds and rhythm

VST options page of DAW REAPER

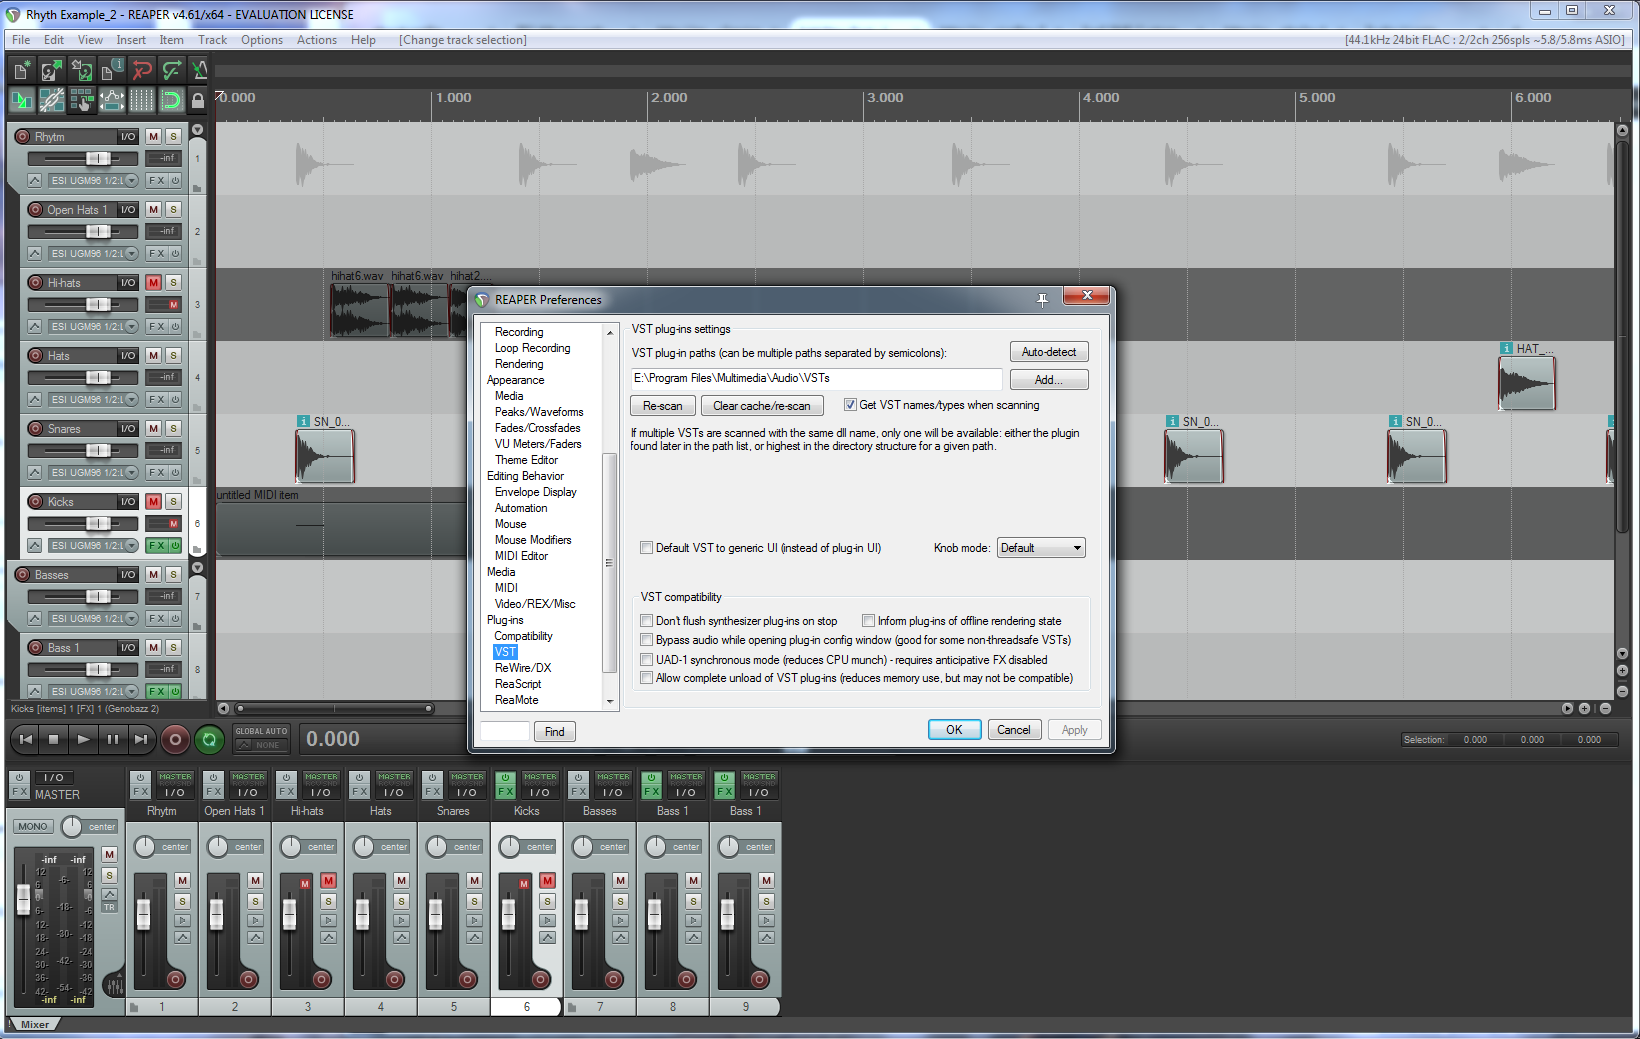
Lets continue our acquaintance with DAW REAPER : today we will learn VST ( Virtual Studio Technology – is a technology for plugins creation, which act as instruments, effects and processors, and for their unified connection to different DAWs and other programs ), work with recorded sounds and rhythm of composition. For this purpose we will create simple example, for rhythm we will use recorded sounds of snares and hats; simple melody we will create with use of VST synthesizer Genobazz 2, which was created by TEK’IT Audio. You should already have installed DAW REAPER, if you have some difficulties, you can write about them in comments, I’ll answer to you as soon as I’ll have free time. VST Genobazz 2 can be downloaded from Internet, it is a free plugin; you can find links to it in Google. It is distributed in form of executable installer; create somewhere VSTs folder, in which you’ll install plugins, they can be used by other DAWs also, so it is better to place it on path, that is accessible by all programs. Then install Genobazz 2 in this folder; then open options page in DAW REAPER Options -> Preferences ( this window can be seen on upper image ); choose VST in left list, add path to you VSTs folder in according field and press Clear cache/Rescan, so that DAW will find and install this plugin. Then download archive with project example and open it in REAPER.

DAW REAPER : Rhythm and basses

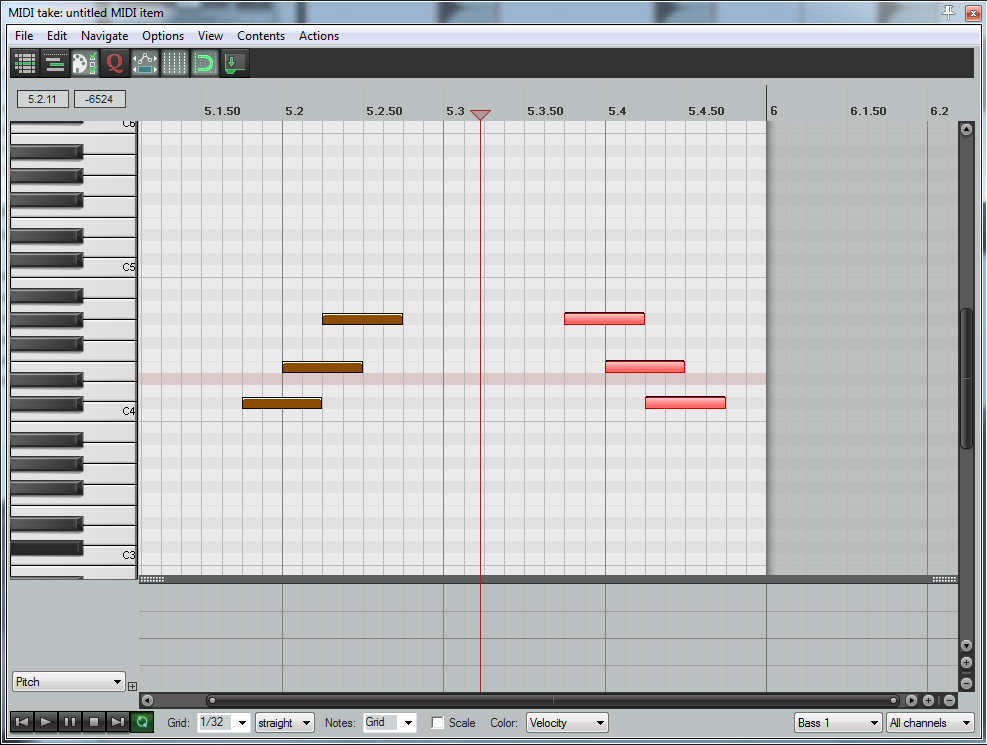
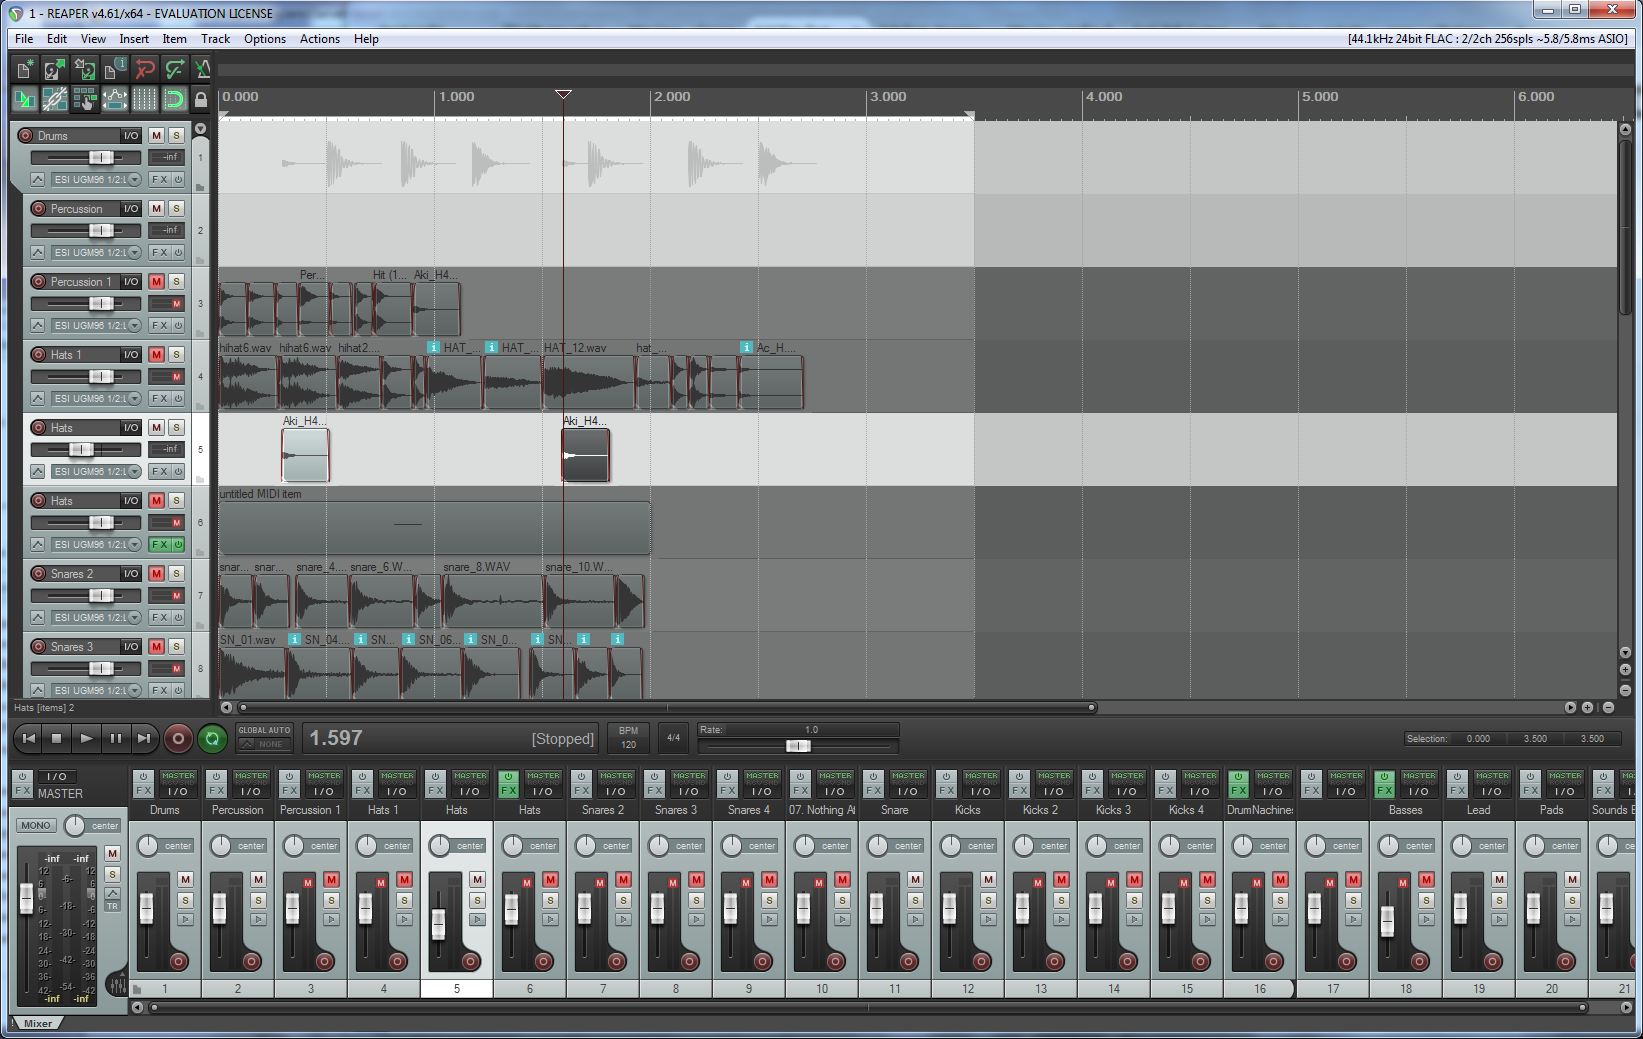
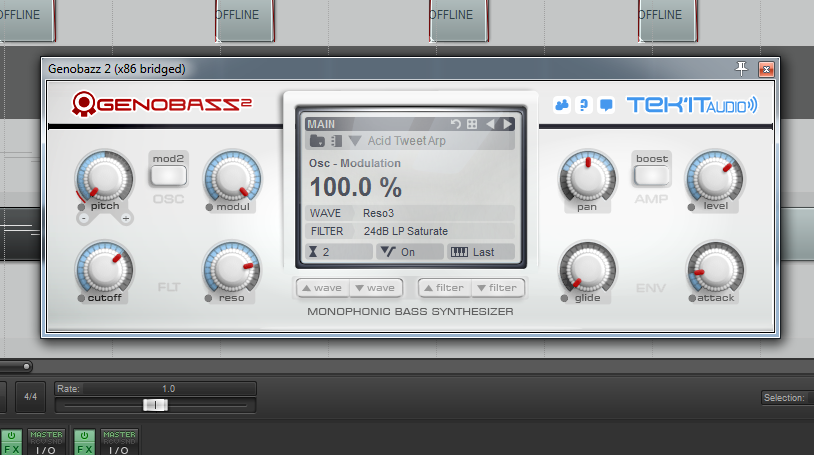
As it can be seen from the image, rhythm is created with use of recorded sounds ( they are located in project archive ). All sound files can be inserted into tracks by dragging and dropping them from Explorer into DAW, it will import and setup them by itself. Basses are synthesized with use of MIDI notes, for them I selected two sounds presets ( preset sound synthesis parameters ) of Genobazz 2 : Defaul and Acid Tweet Arp. VST plugins can be added to track by clicking on FX button; then on Add add button and by selection of VST ( for effects and processors ) or VSTi ( for instruments ). REAPER also supports other plugins formats and its own scripting language for sounds processing. Order of plugins matters, because sound signal is passed from current plugin to next one, this way sounds processing chains can be created, for example : synthesizer receives MIDI notes and generates sound, which later is processed by effects, so that needed sound will be obtained. VST plugins can be added to MIDI tracks and to tracks with recorded sounds. MIDI notes can be edited by double clicking on their panels in track; to the left on their editing windows musical keyboard is located, at the bottom part there is area in which other notes parameters can be edited, for example, velocity of keys pressing ( whether these additional parameters will be accounted by synthesizer : depends solely on itself ).

DAW REAPER VST Genobazz 2

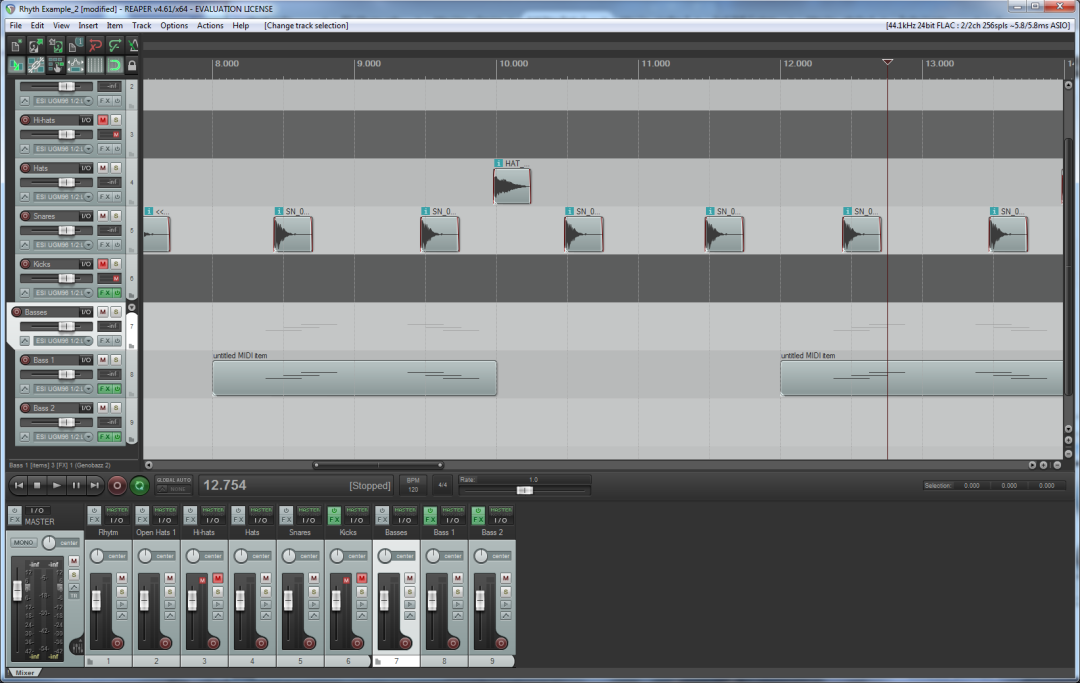
This project example is very simple and there is ability to experiment with it, creating composition, which you like. For example, there is disabled track, which can be used to create rhythm with kicks and receive House music rythm; all in all, here is ability to unleash your imagination. That is it for today; if you have any questions, you can ask them in the comments, I’ll answer to them as soon as I’ll have free time for this. See you in the next article about DAW REAPER.

DAW REAPER MIDI notes editor

Introduction to DAW REAPER

DAW REAPER main window

Today we will meet with DAW ( Digital Audio Workstation ) REAPER. Unlike other modern DAWs, which are oriented on sleek design to motivate users to buy them and on semi-automatic performance of different actions, REAPER is more oriented on professional work with sound and provides functional instruments, which provide lots of possibilities and require understanding of what user is currently doing and some degree of technical education in this area. Because of this : from one side, this DAW is more difficult to study for novices, but from the other side, it provides lots of possibilities, which may be unaccessible in other studios due to semi-automatic nature of their instruments. REAPER can be downloaded and used for free for 60 days; after this period of time there is need to purchase program : at its startup pop up window appears, which asks to buy program, after 5 seconds it can be closed and no functions are restricted; but this program worth its money and should be bought according to license. It costs 60 or 225 USD, depending on usage scenarios; its site is located here : http://www.reaper.fm/ .

Lets briefly become acquainted with interface of program : in the central part there is tracks area, which allows to place sounds, MIDI notes, control automation of sounds, synthesizers, effects and other instruments and perform large amount of other operations; this is the main work area of program. To the left there is column with tracks handlers, which allow to control their volume, automation, switch on and off tracks, add instruments and effects to them and perform lots of other operations. Some tracks in this area can be made folders, which allow to group tracks and control them all and apply effects to all of them in bulk ( this also saves computer resources, because this way effects are applied to single track after mixing of all sounds into it, instead of application to each track individually ). At the bottom part of window there is mixer panel, which allows to control tracks parameters individually and set parameters of the whole composition. At the top part of window menu, buttons and hardware information reside.

There is ability to work with DAW this way : record sounds or use existing ones, place them on tracks or attach VST instruments to tracks and place there MIDI notes, which activate these instruments; then, when composition will be ready, it can be exported into lossless formats ( FLAC, WAV and others ) or lossy formats ( Ogg, MP3 and others ). Before actual composition creation, there is need to think about it and feel it, make plan and then implement it. If there is no complete picture of composition, there is ability to create parts of it and its story : rhythm parts, melody, pads, sounds effects and experiment with them, by changing them and moving them here and there until feeling will come. Periodically I’ll write articles about work with this DAW, with VST instruments and effects ( FM-synthesizers, compressors, distortion, delay and others ) and will publish little examples for you to study on them. Lets say in ahead, that I’m not professional musician and for me it is hobby and rest after work, but I know how to work with this DAW ( there is not big amount of information of work with it ) and have knowledge of technical aspects of electronic music and can share my knowledge and experience and at the same time learn something by myself. Thats is all for today, see you in the next articles.