Variation on Teardrop – Massive Attack theme in DAW REAPER

Variation on Teardrop - Massive Attack theme in DAW REAPER
Variation on Teardrop – Massive Attack theme in DAW REAPER

Love, love is a verb
Love is a doing word
Fearless on my breath
Gentle impulsion
Shakes me, makes me lighter
Fearless on my breath …

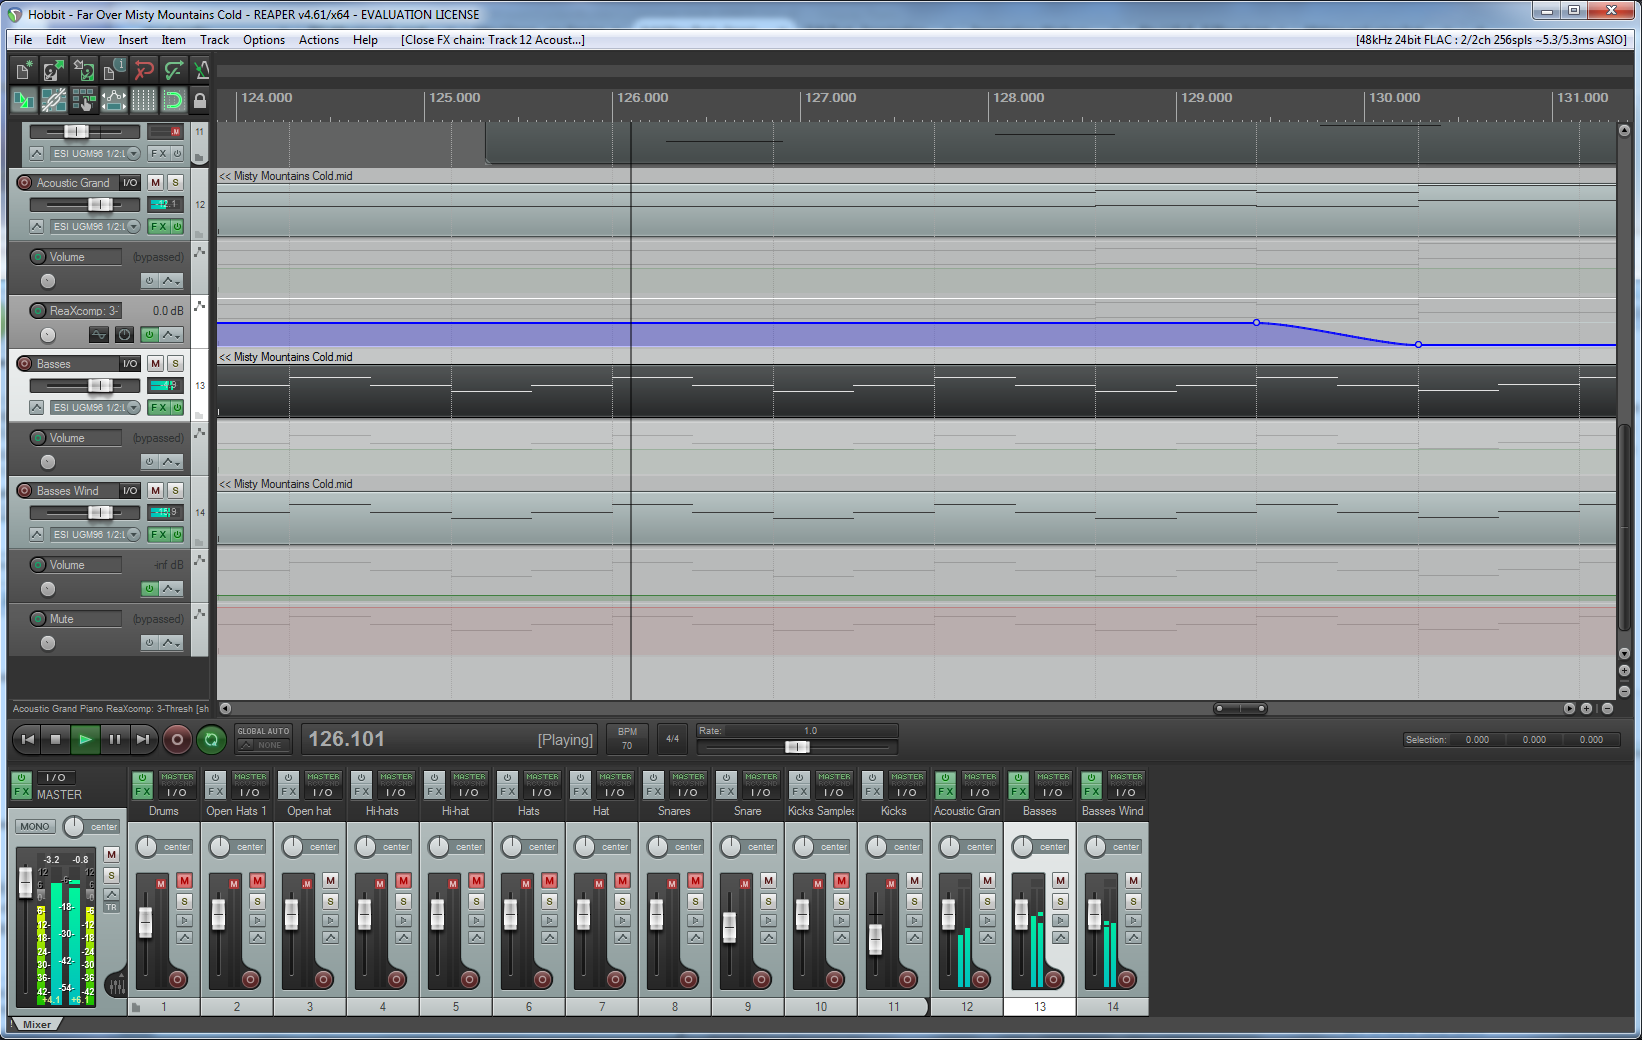
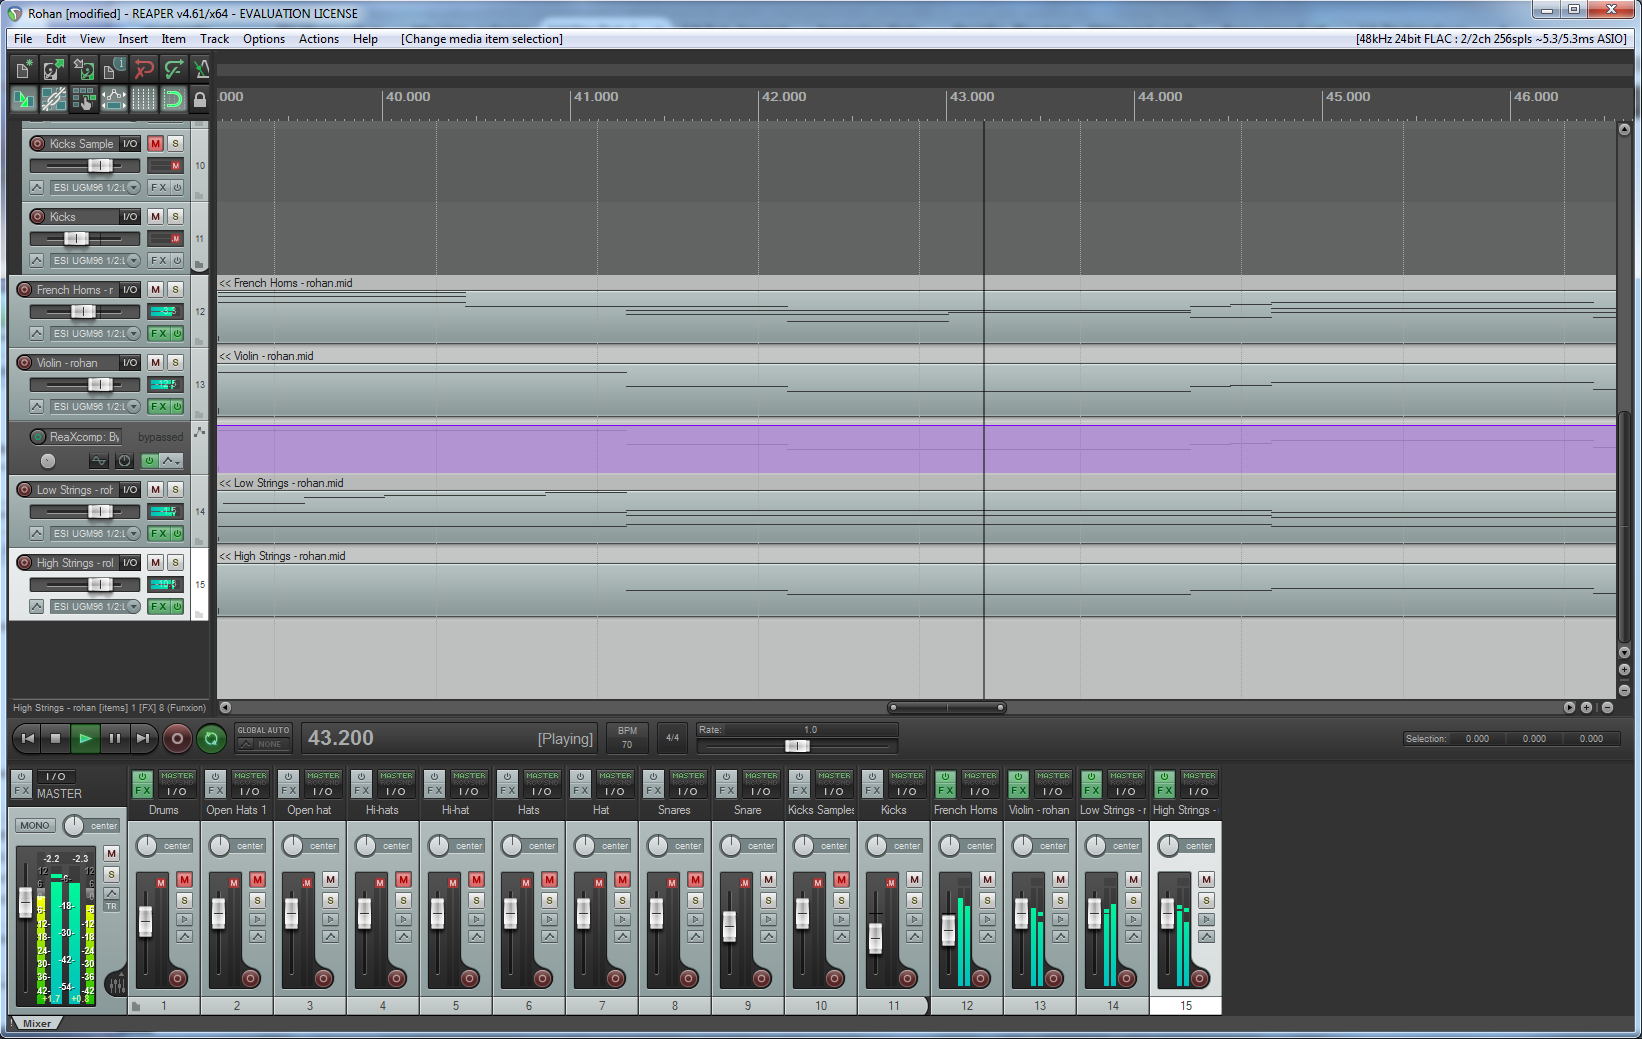
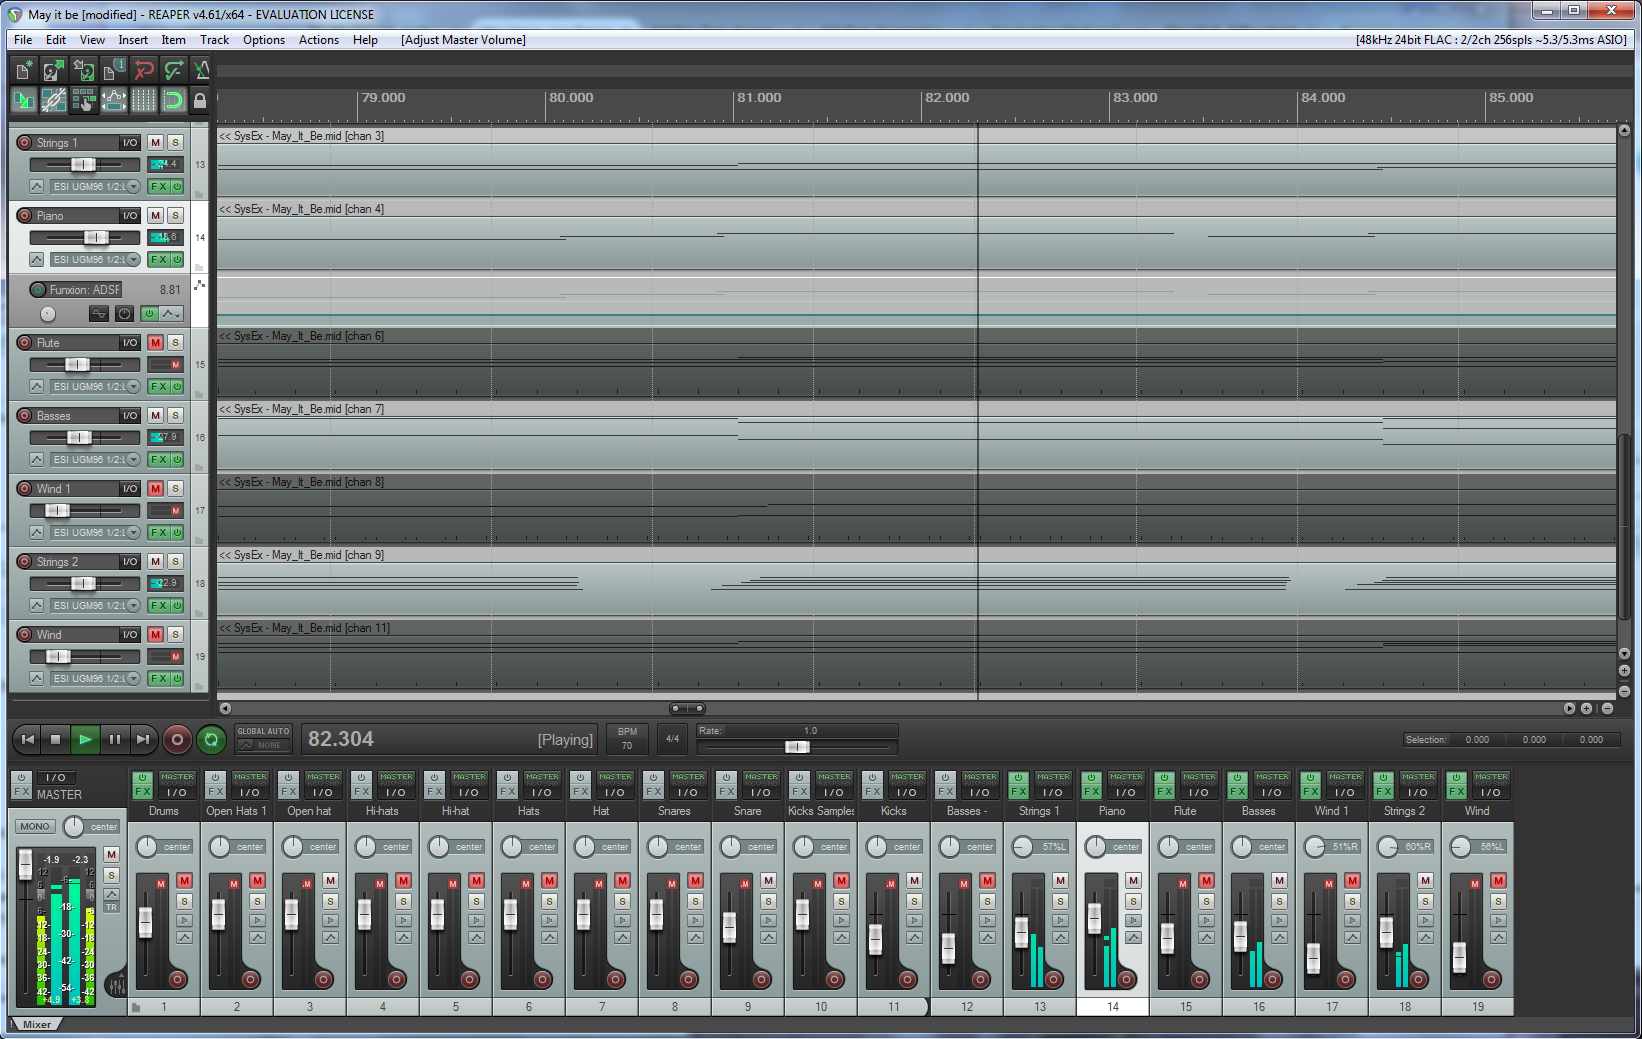
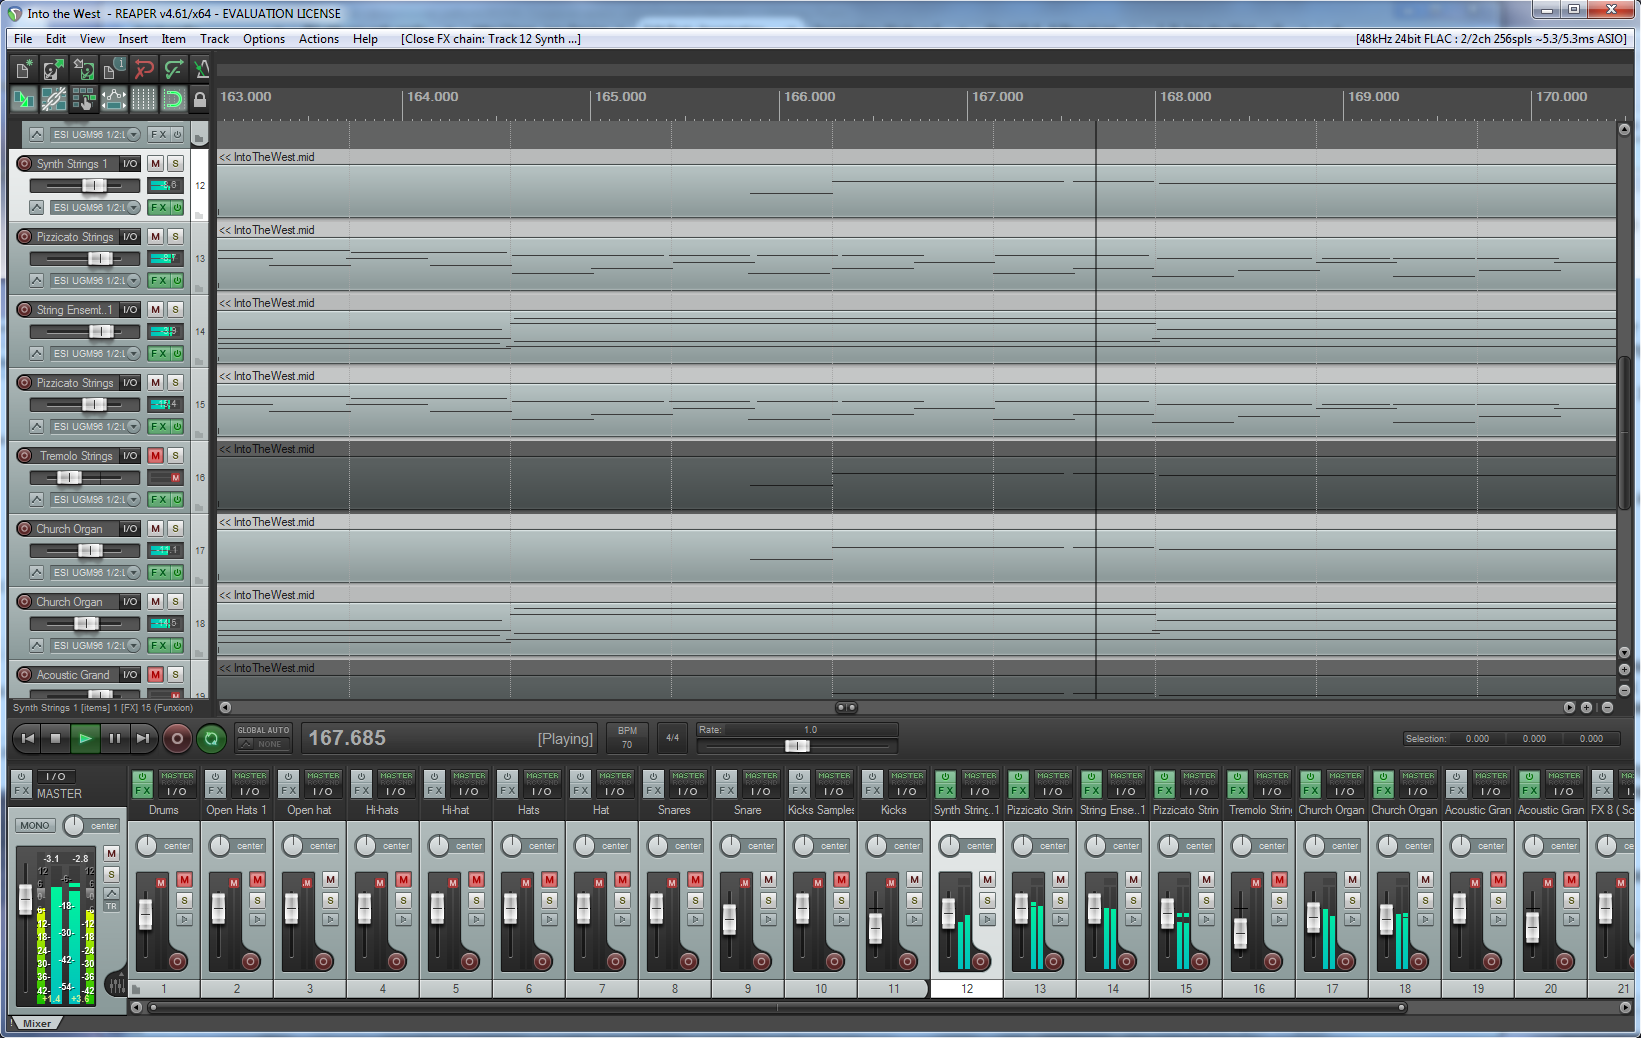
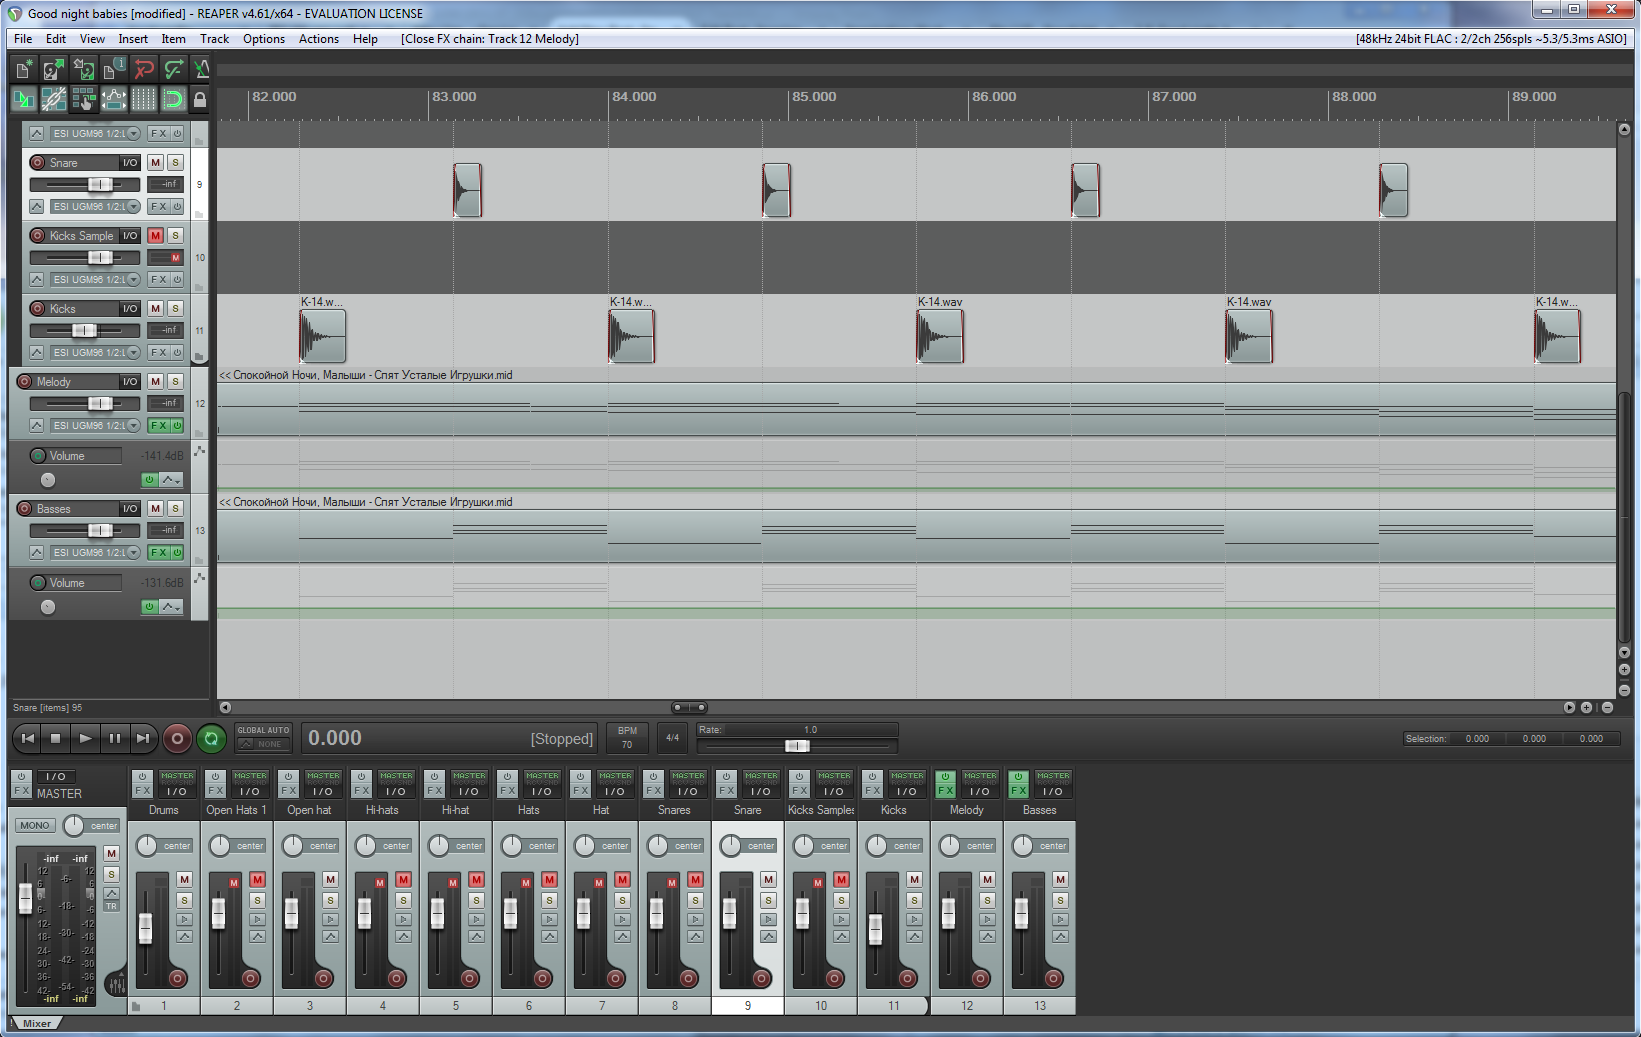
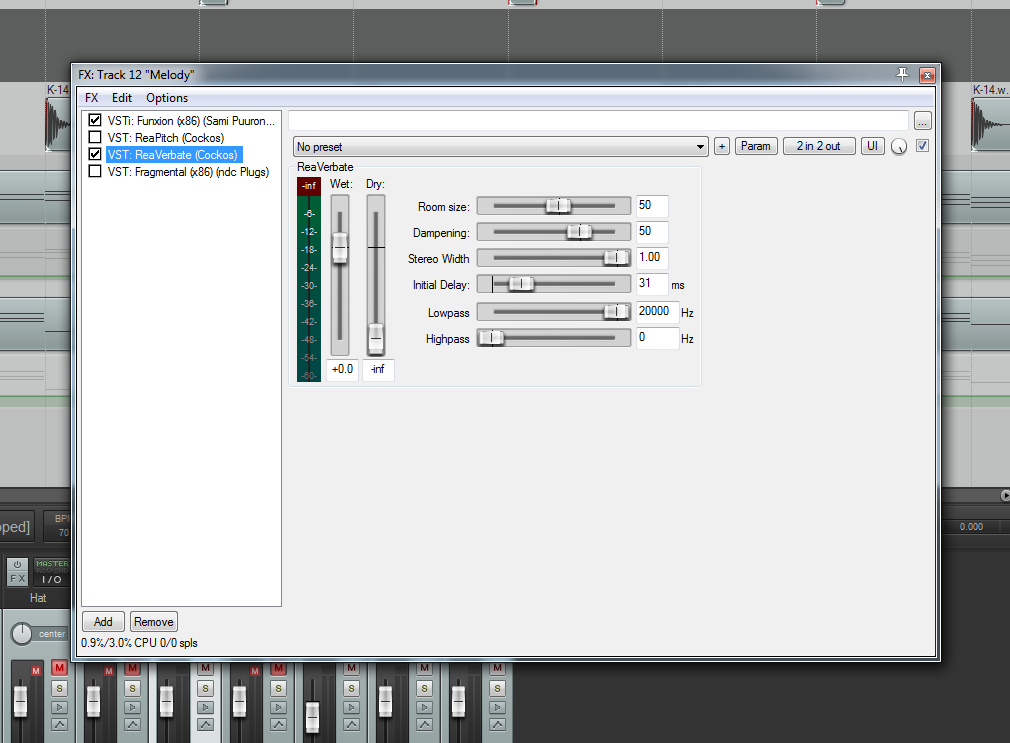
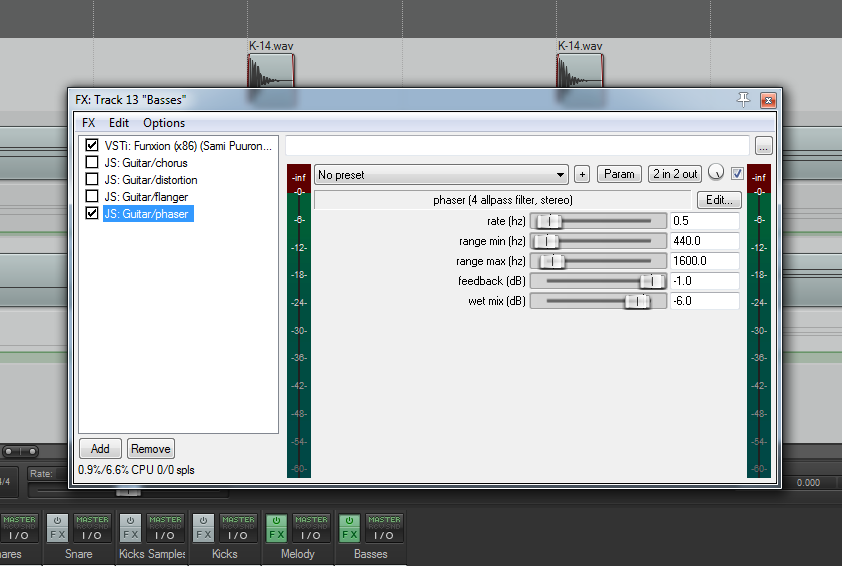
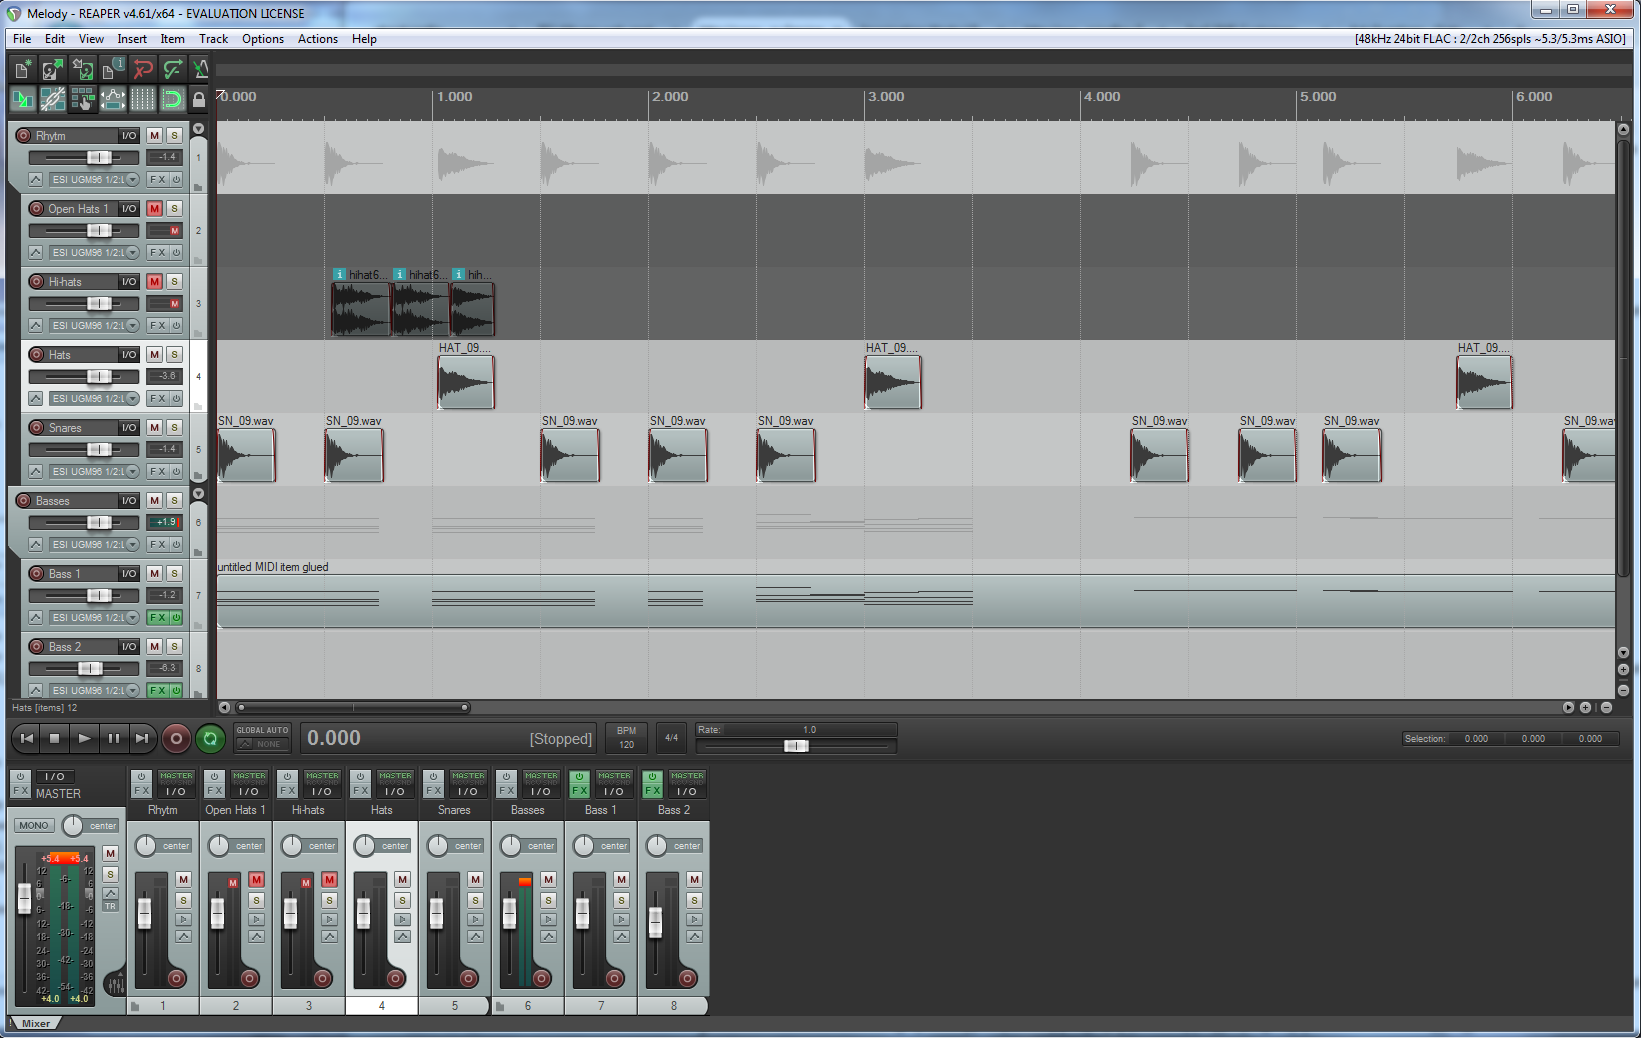
Under the the impression of performing of Teardrop composition of Massive Attack collective on electric keys on Gastronom-Fest ( RU ), I wished to create its variation in DAW REAPER with use of program VST instruments and effects. For this I downloaded from Internet 2 MIDI files with melody notes, combined them, slightly edited and chose the best sounding together instruments. Then with use of reverberation added volume and expression to main instruments and with compression adjusted dynamic range of additional instruments, so that their volume variations would not highlight them too much. Then tracks volume balancing, addition of volume automation for main instruments : they are switched on and off smoothly, this way it has more dynamics and saturation.

… Teardrop on the fire
Fearless on my breath

Night, night after day
Black flowers blossom
Fearless on my breath
Black flowers blossom
Fearless on my breath …

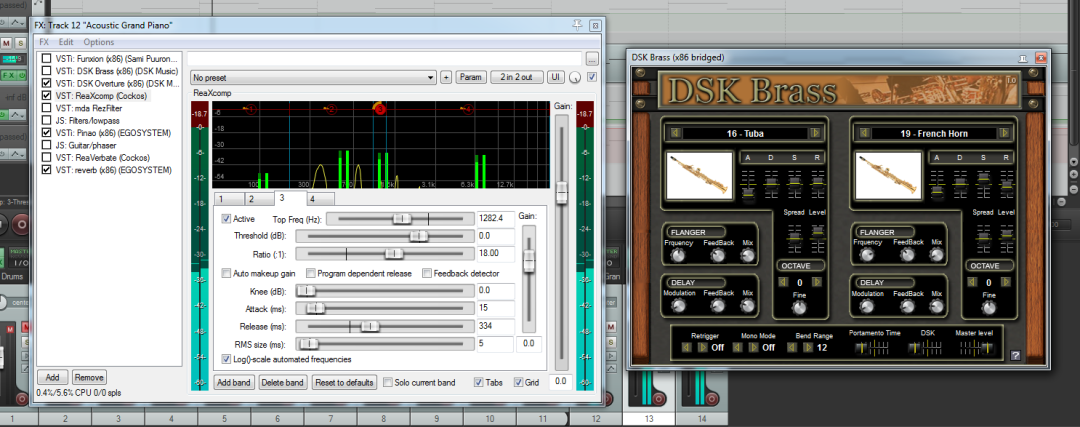
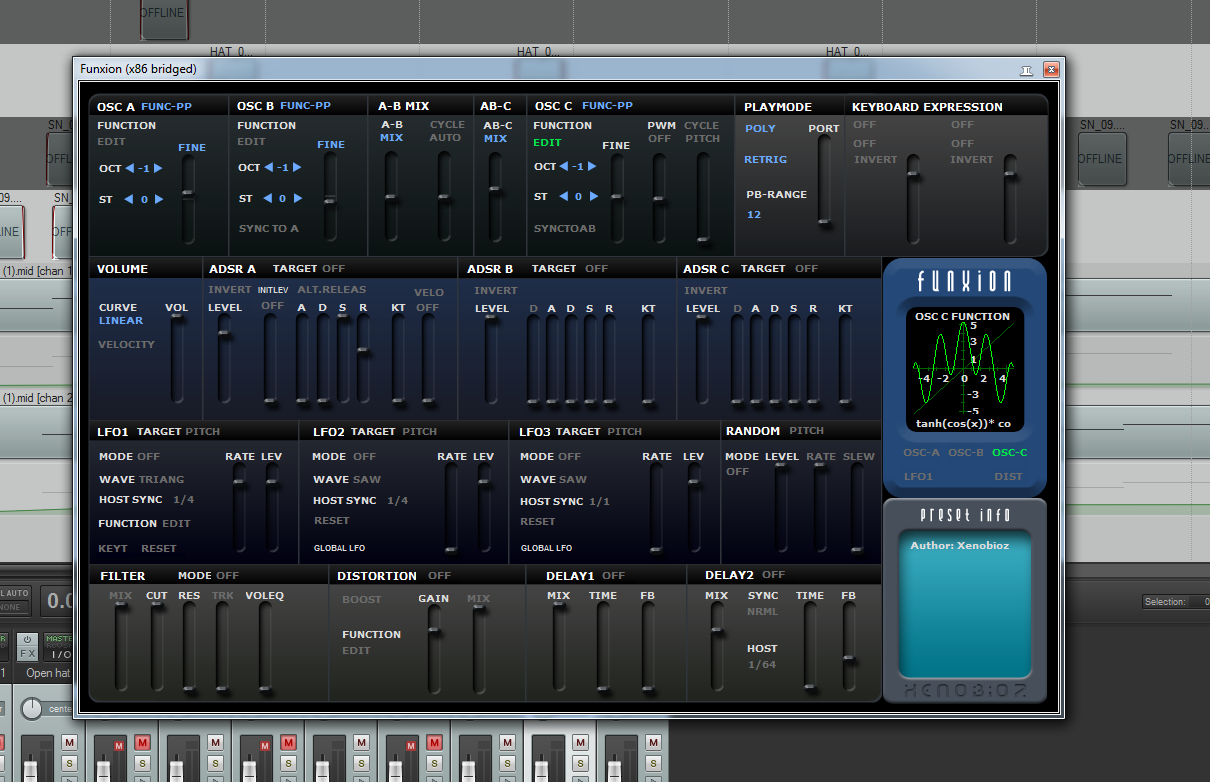
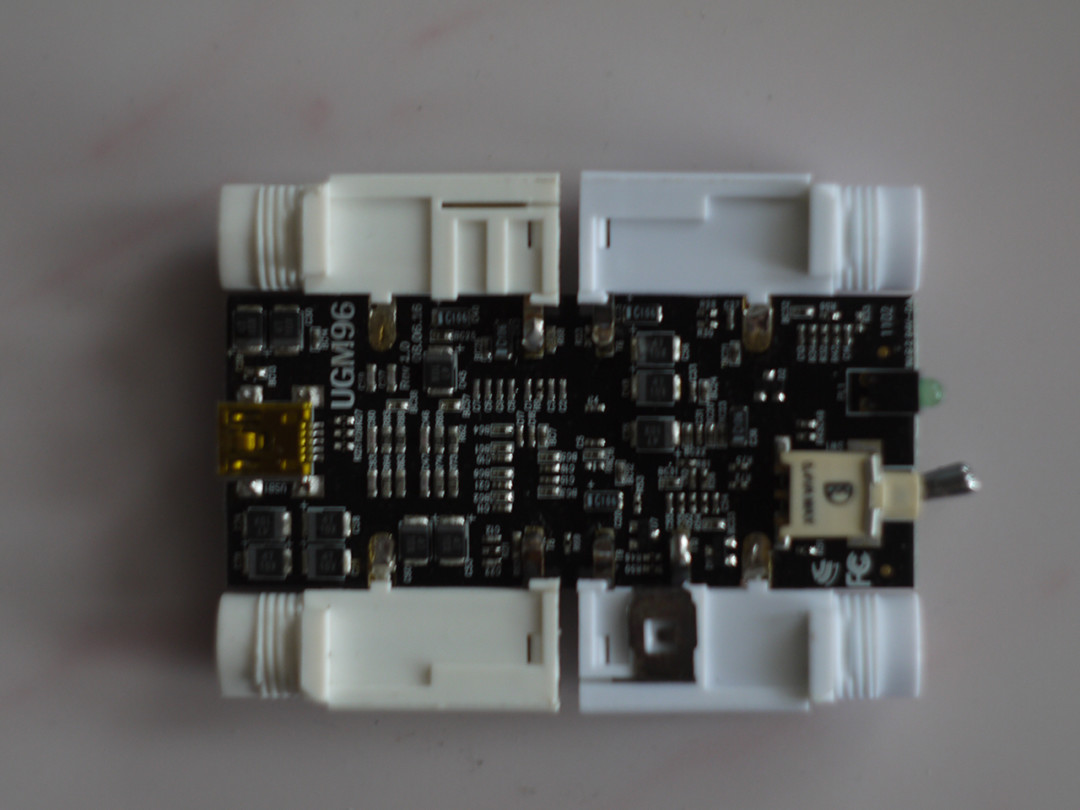
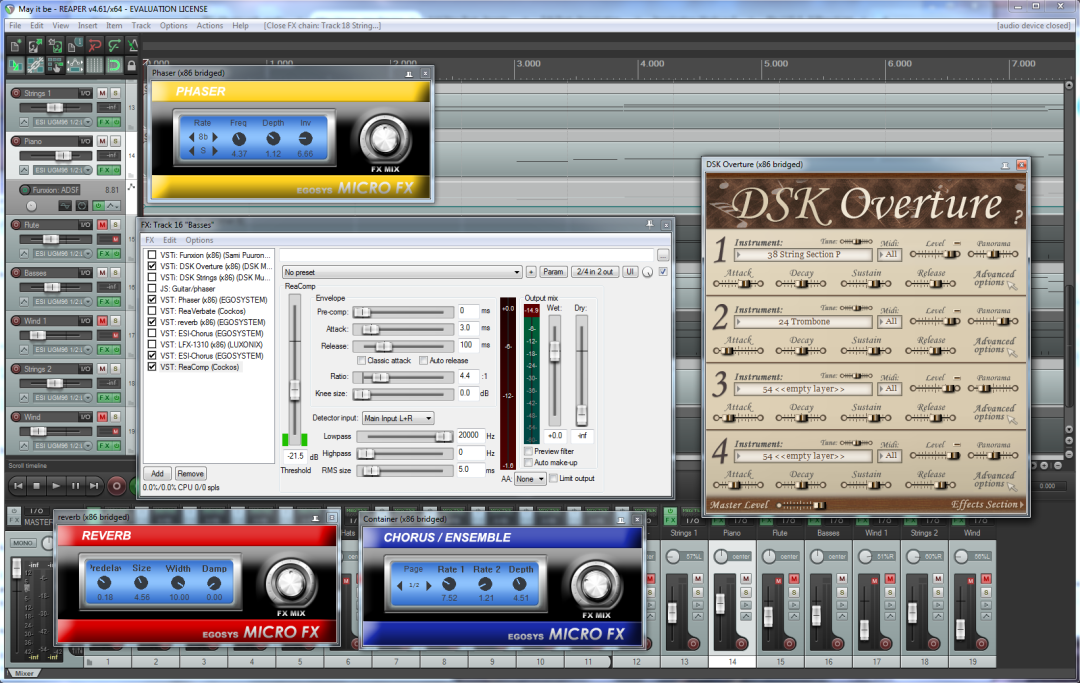
Main instruments in composition are sampler VST synthesizers ESI Piano and DSK Overture with instrument Harpsichord, additional ones are ESI Piano and DSK World Strings with instrument Celtic Harp. + Small changes of sound synthesis parameters, such as built-in effects, filters and other parameters. For drums sounds I used drum-machine DSK DrumZMachineZ, which allows to synthesize sounds the same way, as hardware drums synthesizers do, there are 18 of them presented in program ( among them, for example, there are : Roland TR 808, Acetone Rhythm Ace, Akai XR10, Alessis HR 16, Boss DR55, Korg DD1, Yamaha RX 11 and others ), there is also ability to change their different parameters, creating needed sound. DSK also has sampled drums synthesizers, which allow to generate sounds on base of recorded samples, but with fully electronic generators it is easier to work and create needed sound. You can download project files for DAW REAPER via this link : Variation on Teardrop – Massive Attack theme in DAW REAPER. Onwards I’ll work on creation of next composition, Stay Tuned!

VST instrument DSK Overture and effects ESI Phaser, Reverberation and Chorus and ReaCompressor in DAW REAPER

… Teardrop on the fire
Fearless on my…

Water is my eye
Most faithful mirror
Fearless on my breath
Teardrop on the fire
Of a confession
Fearless on my breath
Most faithful mirror
Fearless on my breath …

Slightly in more details about instruments, used in Massive Attack’sTeardrop composition creation : ESI Piano – is a piano synthesizer, which allows to change different parameters of sound generation, for example, Sustain and Resonance, as well as to apply built in reverberation for simulation of room, in which instrument plays. DSK Overture – is a sampler instrument, generating sounds of large amount of instruments : wind and strings, among them there are, for example : harp, cello, contrabass, flute, french and english horns, trombone and others. DSK World Strings is also a sampler synthesizer, which presents instruments of different peoples of the world : Celtic harp, dobro, dulcimer, koto, kanun, tar and others. About DSK DrumZ – MachineZ there is also ability to say, that this instrument allows to combine sounds of drums, generated by different synthesizers in one part, and set their position in stereo picture and sound volume level.

… Teardrop on the fire
Fearless on my breath

You stumble in the dark

Massive Attack – is a British group, founded in Bristol in 1988 year by Robert “3D” Del Naja, Grant “Daddy G” Marshall and former participant “Mushroom” Vowles ( “Mush” ). They create electronic music in Trip hop style, for which slow paced rhythm and mainly sad and melancholy mood of compositions are characteristic. Their debut album Blue Lines was released in 1991 year and contains one of the most well known tracks of group Unfinished Sympathy, their third album Mezzanine, containing composition Teardrop, to which this article is devoted, was released in 1998 year. Both albums are considered one of the best in all history of modern music creation; Massive Attack was nominated on and received lots of musical awards, among which there are : MTV Europe Music Awards, Q Awards, Brit Awards and others. Teardrop is one of the most widely know compositions of collective all around the world, it was used in large amount of films and on television; it has lots of variations and remixes, +1 one of which is presented on this page :-) .

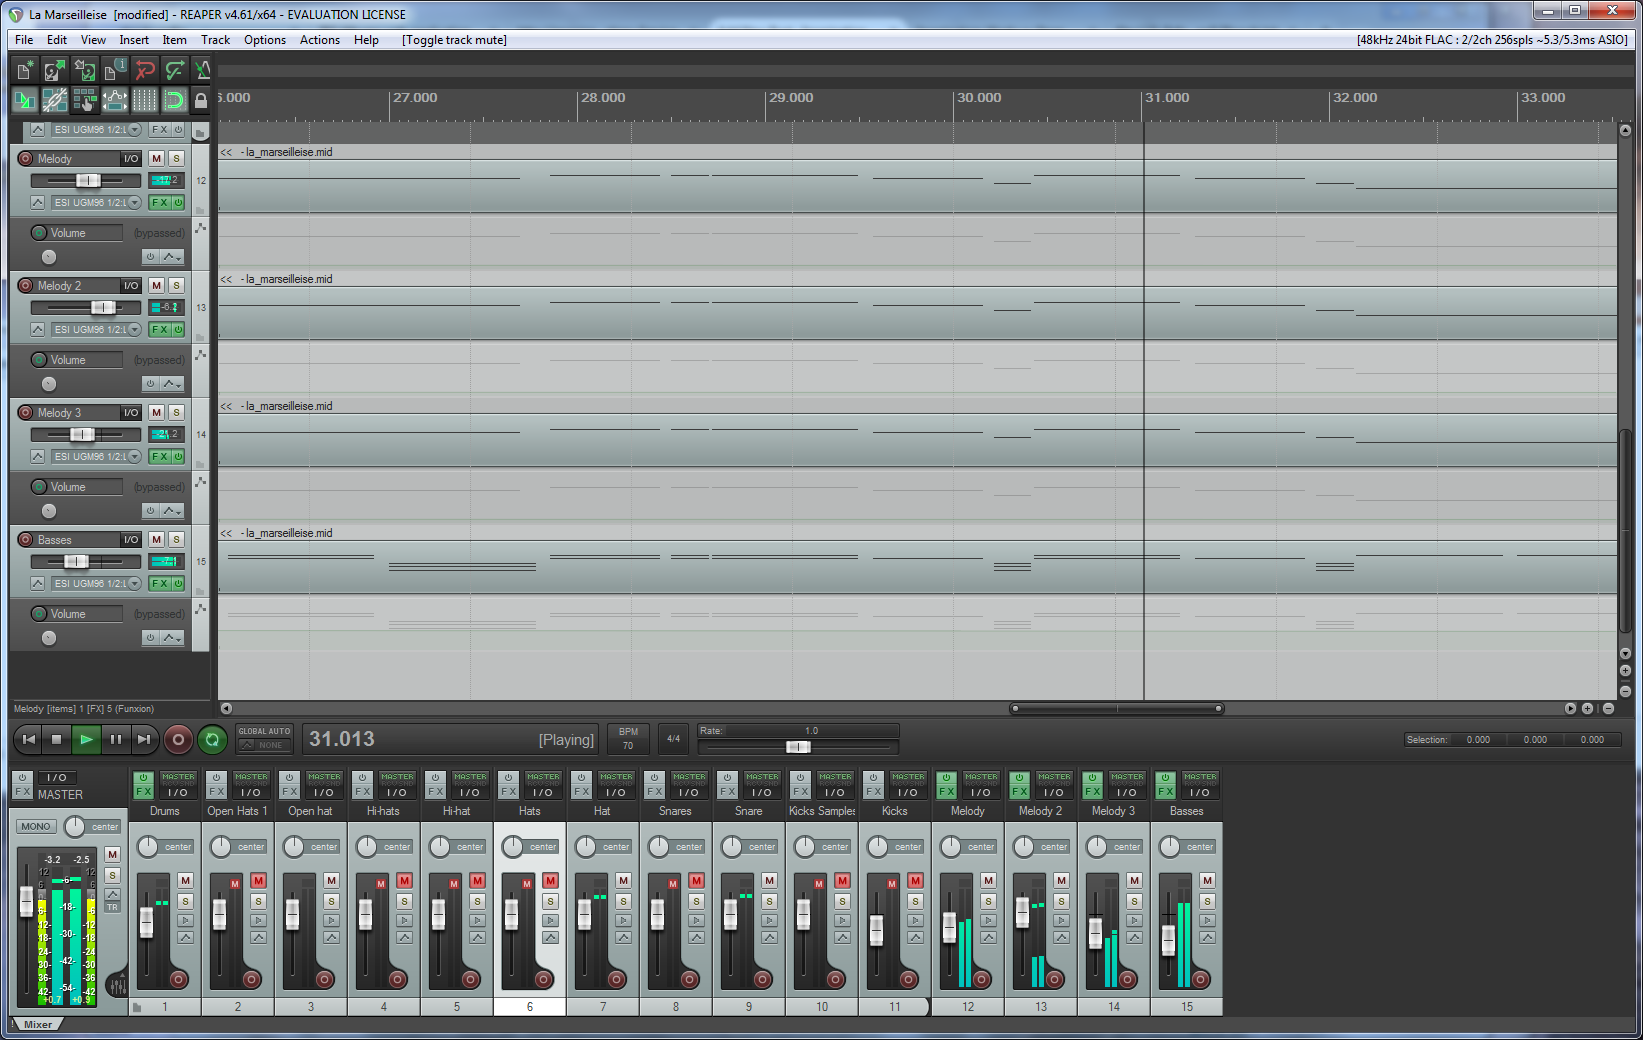
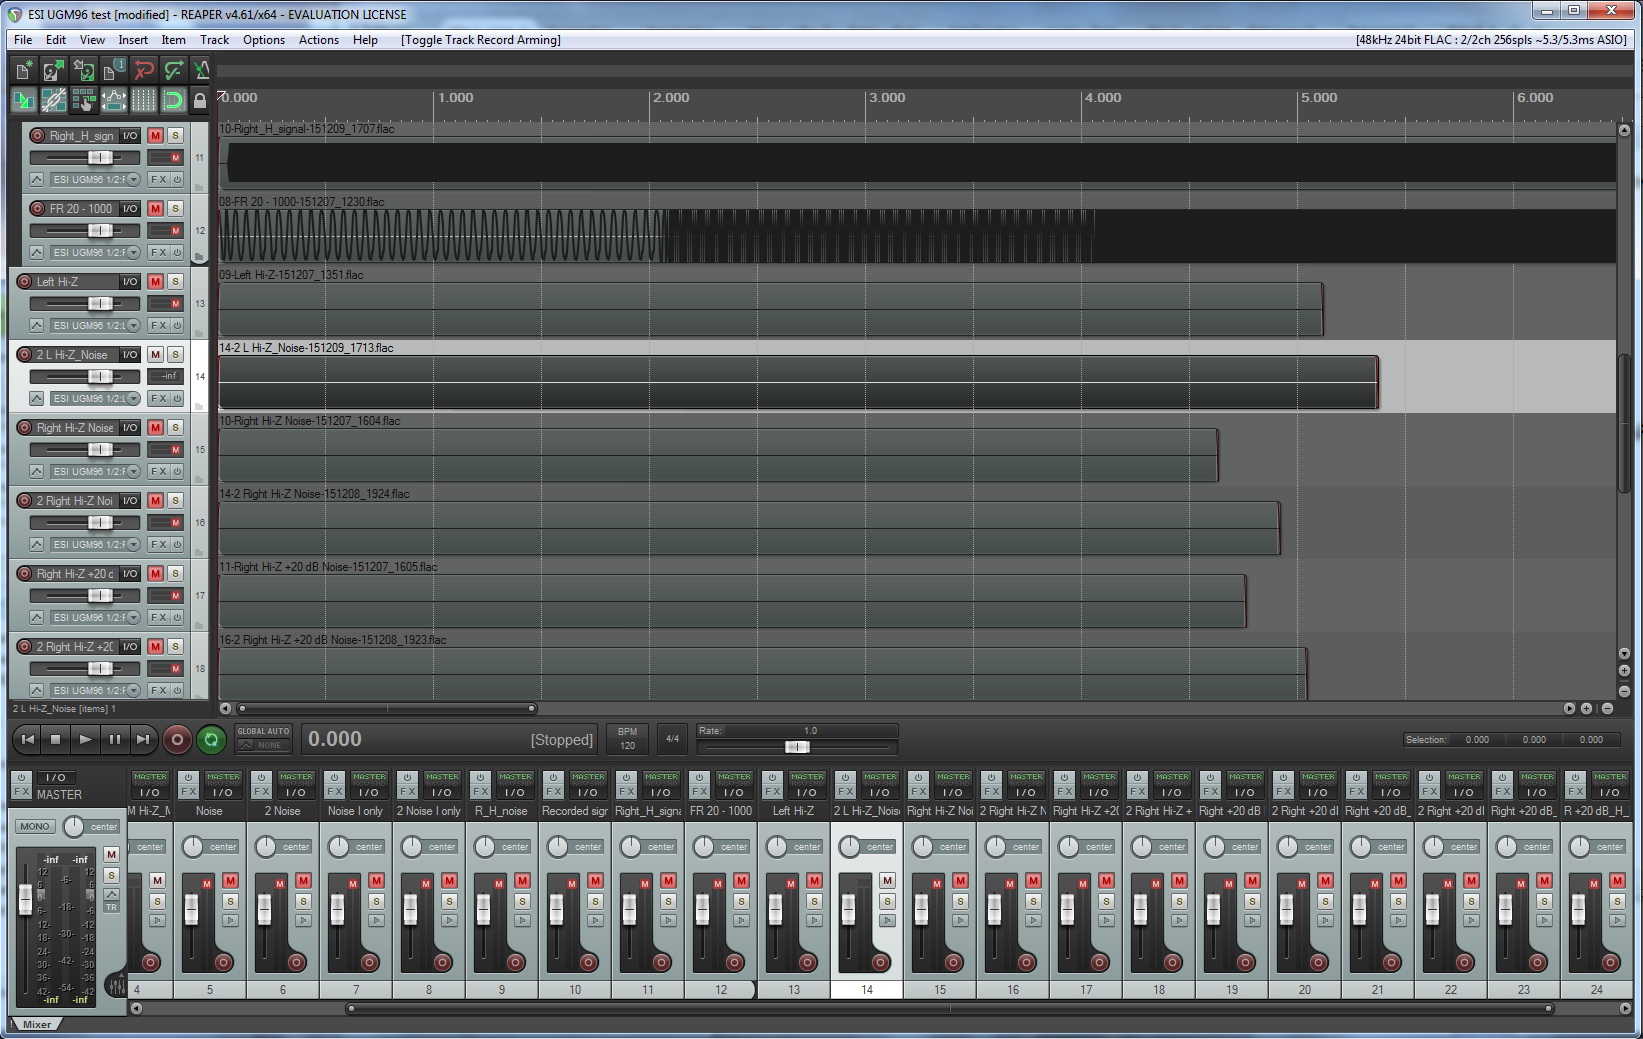
REAPER ( Rapid Environment for Audio Production, Engineering, and Recording ) – is a Digital Audio Workstation, developed by company Cockos Incorporated from 2004 year. In its creation and advancement main aspects are set on professional functionality and small price, instead of large amount of already completed half-automated instruments and effects, as this is done in lots of other DAWs. Among features of REAPER there are : 64-bits sound processing engine; support of all sampling rates and precisions; support of recording and editing of audio and MIDI on any amount of the tracks; support of MIDI controllers; support of VST, VST3, AU, DX and JS plugins; ability to automate all tracks’ parameters; large amount of already made instruments and effects for sounds and music creation; as well as support of built-in scripting language for audio processing and control of DAW. Program is developed with accounting of wishes of musicians; it is used, for example, by BBC, and by other companies and musicians. It can be used for free in a defined time interval, after this, by license, it should be bought, however its functionality is not limited after testing time period. Current version of DAW works in Microsoft Windows XP, Vista, 7, 8, 8.1 and 10 and Mac OS X 10.5 and newer operating systems; Linux is not supported directly, but there is ability to launch REAPER in Wine emulator.

Far Away from Misty Mountains Cold … ( Hobbit ) in DAW REAPER

Far Away from Misty Mountains Cold ... ( Hobbit ) in DAW REAPER
Far Away from Misty Mountains Cold … ( Hobbit ) in DAW REAPER

Far over the misty mountains cold
To dungeons deep and caverns old
We must away ere break of day
To seek the pale enchanted gold.

The pines were roaring on the height,
The winds were moaning in the night.
The fire was red, it flaming spread;
The trees like torches blazed with light.

Lets create today variation of composition “Far Away from Misty Mountains Cold …” from film Hobbit in DAW REAPER. MIDI notes I took from Internet, thank you goes to their original author; there was almost no need to change anything in them, I only made pauses in the beginning and at the end of composition. There were only 2 instruments : playing main melody and basses, I added 1 track with additional basses to enhance composition. Melody is played by instrument DSK Overture with french horm ( to this instrument I added band compressor ) and ESI Piano, their united sound is processed by reverberation. First basses party is played by instrument DSK Strings with violas section and cello and effects phaser and small reverberation; second basses part is played by DSK Brass with french horn and tuba instrument, the same way processed by phaser and small reverberation. Via this link completed composition in FLAC format and archive with project file and sounds can be downloaded : Far Away from Misty Mountains Cold … ( Hobbit ) in DAW REAPER.

MIDI keyboard emulator FreePiano 2

To mixed sound I applied compressor, which does not give to spikes to overflow dynamic range, and at the same time did not overcompressed it too much to leave a freedom for the movement; this way compressor touches only singular spikes areas and lets other parts to play freely. Also I increased its Release parameter, so that on the spikes following each other closely volume movement is not noticeable. Main melody instrument has one area, on which sounds with 1 – 1.5 kHz frequency are very loud; I applied band compressor to it, to reduce its volume, so that it does not cut the hearing. And made smooth automation of its Threshold parameter, so that it will not touch other areas of composition and descended to needed volume only on this part. Then, to make compositions parts more highlighted and differentiating from each other, without loose of interest and intensity, I smoothly switched off second basses track in the beginning of composition and enabled it only on the first and second strong parts, disabling it at the conclusion as well. Second part is stronger, than the first one, due to high intensity of composition, and is a culmination of the whole soundtrack, so I did not changed anything in them to increase their differentiation.

VST processor ReaXcomp and instrument DSK Brass in DAW REAPER

Also in the Internet I found MIDI keyboards emulator FreePiano 2, which allows to play music on usual computer keyboard and record MIDI notes; there is also ability to plug in to it different VST instruments, to hear sound close to the result, and there is ability to set layout in a convenient way. It allows to control different MIDI parameters of the track, such as sustain pedal signal, notes velocity, octaves shifting and others; after notes recording, there is ability to import them into DAW and perform more fragile notes tweaking in editor, for example, correct their timings or presses velocities. With it I made small addition in the composition conclusion, repeating basses notes, for more melodic epilogue.

VST instrument DSK Overture and effects ESI Phaser, Reverberation and Chorus and ReaCompressor in DAW REAPER

Before compressors application I also balanced volumes of instruments, so that they play in accordance with each other and do not silence each other; with compressors I only withheld volume’s peaks, leading to overflows, when all other parts play in composition. I also have MIDI notes of Song of the Lonely Mountain, it is very much like this one, but longer and more complex and melodic, I’ll make its variation next time, shaping it to my taste. This is all for today, look in the REAPER project for details and write your questions in the comments, see you next time.

The King of a Golden Hall ( Rohan, The Lord of the Rings ) in DAW REAPER

The King of a Golden Hall ( Rohan, The Lord of the Rings ) in DAW REAPER

Music from The Lord of the Rings inspires, lets continue creation of compositions from this film with soundtrack “The King of a Golden Hall ( Rohan )” in a DAW REAPER. MIDI notes I downloaded from Internet, thank you goes to their original author, this time in tracks and notes themselves there was almost no need to change anything : everything already worked. Only for main instruments I applied band compressor ( it compresses only part of frequencies, instead of a whole range ) and applied automation to it to switch it on only in needed parts, so that it will not touch areas, which play good without it. In composition there are only 4 tracks : wind instruments ( sampled synthesizer DSK Brass with preset French Horn, low-pass filter to remove high frequency noise and ringing and reverberation ), violin ( DSK Strings with preset Violin and reverberation ), low frequency string instruments ( DSK Overture with contrabass and cello + phaser + small reverberation ) and additional string instruments, playing only in key parts of composition for its strengthening ( DSK Strings with viola and harp ). Via this link completed composition in FLAC format and archive with project file and sounds can be downloaded : The King of a Golden Hall ( Rohan, The Lord of the Rings ) in DAW REAPER.

VST instrument DSK Overture and effects ESI Phaser, Reverberation and Chorus and ReaCompressor in DAW REAPER

For reverberation and phaser I used VST plugins, coming with ESI sound card, for band compressor built-in effect of REAPER and for low-pass filter scripted effect of this DAW. All in all creation of this composition is much easier, than other ones : tracks and MIDI notes are of high quality, there is ability to attach instruments and effects, make small adjustments and strokes and composition plays. I did not added drums to it, because it plays without them and they are excessive in it.

Hybrid VST synthesizer Funxion in DAW REAPER

Then small balancing of instruments’ volumes, so that they play together in composition and do not try to silence each other; in this sound track I did not moved instruments in stereo picture, because there are not much of them and their movement would cause emptiness in other channel. Then small amount of listens, render of the project into FLAC file and composition ready. Next time I’ll continue work in this direction and will create variation of other composition, see you in the broadcast.

May it Be, Enya, The Lord of the Rings in DAW REAPER

May it Be, Enya, The Lord of the Rings in DAW REAPER

Today’s article about music creation in DAW REAPER will be devoted to May it Be composition of Enya, which also was used in The Lord of the Rings film. For its creation I downloaded MIDI notes from Internet, thank you goes to their original author, used large amount of instruments and effects and in final version left only sampler synthesizer DSK Overture and effects ESI Chorus, Reverberation and Phaser and built-in compressor to keep basses dynamic range in control. In the source MIDI file there is large amount of tracks, which with rich for frequencies and movement sounds of DAW produce mess, so I left only 4 of them : main strings instruments, flute ( main instrument ), basses and additional strings instruments, which play only in key parts for their strengthening. To make sounds of main and additional strings instruments do not create dissonance, I separated them by stereo channels, this also added volume to composition : to the left there are one instruments, to the right – others. Completed composition in FLAC format, along with project source file and sounds, can be downloaded via this link : May it Be, Enya, The Lord of the Rings in DAW REAPER.

VST instrument DSK Overture and effects ESI Phaser, Reverberation and Chorus and ReaCompressor in DAW REAPER

Source tracks’ MIDI-notes have large amount of overlaps of sounds frequencies, which create audio mess; for example, tracks of string and wind instruments have notes, which move into basses area, wherein basses have notes, which ascend to middle frequencies; so, I removed from tracks all notes, that move outside of ranges. Then applied to sampled synthesized sounds of strings and wind instruments low-pass filters with high cut-off frequency, so that they’ll not move into high frequencies range to main instrument domain – flute. For it I used large amount of different instruments : piano, synthesized flute ( it even sounds more or less good and fits composition ) and other instruments, but exactly sampled synthesized flute sounds fit composition the most. In some of its notes’ sounds there are tambourines, but there is nothing to do about it : instrument is free and high quality in all other respects; clean quality can be obtained with paid sampled synthesized instruments, which use Sound Font samples. There were also large amount of experiments with instruments, effects and their parameters to balance composition and make it sound good ( for example, use of envelope’s Release parameter automation of synthesized in Funxion flute, to make it sound longer at the ends of notes groups, than at the ends of notes inside groups ), I did not described all of them to not increase article size 2 – 3 times and shown only final result.

Hybrid VST synthesizer Funxion in DAW REAPER

In process of composition creation there were large amount of listens, adjustments makings and listens again till composition started to sound in a needed way; then instruments’ volumes balancing, to make them sound together instead of silencing each other, for example, I decreased basses volume, because this composition is not with a basses power, but a melodic one. Then a few amount of tweaks and composition started to sound good enough. This is it for today, check details in project’s file and ask questions in comments, if you have ones. Next time I’ll create variation of other composition to continue development in this area, see you next time.

Into the West ( The Lord of the Rings ) in DAW REAPER

Into the West ( The Lord of the Rings ) in DAW REAPER

What can you see
On the horizon?
Why do the white gulls call?
Across the sea
A pale moon rises
The ships have come to carry you home

Today we will talk about creation of variation of composition Into the West from The Lord of the Rings film in DAW REAPER. In addition to already confortable FM synthesis and effects we will use VST instruments MDA Piano and DSK Strings and compressor to keep in control dynamic range of main instrument. I took MIDI notes from Internet, thank you goes to their original author; in them there are 13 tracks, with simple MIDI instruments everything sounds more or less good, but with rich in frequencies and movement sounds of DAW there is a mess, so I left only 6 of them. Among them there are : 2 plucked strings instruments ( hybrid synthesizer Xenobioz Funxion with preset Pianoid VeloSens and reverberation effect and it again with Muted String preset and reverberation ); 1 atmospheric and basses instrument ( Xenobioz Funxion + modified preset Flute and DSK Strings with preset Simply Viola, to both of them I applied reverberation, this way one composite sound is produced and it them reflects in the hall, and phaser ); 1 piano ( MDA Piano + preset School Piano + reverberation ); 1 basses instrument ( DSK Strings + Simply Viola + reverberation ); and 1 singing instrument ( Xenobioz Funxion + modified preset Royal + reverberation ). Via this link you can download completed composition in FLAC format and archive with project file and sounds : Into the West ( The Lord of the Rings ) in DAW REAPER.

Instruments MDA Piano and DSK Strings in DAW REAPER

DSK Strings generates sound from recorded instruments samples; reverberation is implemented in it in not a best way : when notes are ended and at rapid start of next ones, reverberation does not completes in time and is interrupted with new notes beginning, this creates hearable noise and clips, so it is better to disable built-in reverberation in DSK Strings and use external effect for this. MDA Piano synthesizes sound via FM synthesis, MDA also has VST instruments ePiano and DX10 Synth, which create interesting sounds as well. For reverberation and phaser effects I used VST plugins, which come with ESI sound card : I like them more, there is ability to use built-in in REAPER effects instead of them or download from Internet VST plugins and experiment with their controls.

Compressor in DAW REAPER

I did not used drums in this project, because they do not fit to this composition : it is ready and completed without them and they are excessive in it. Also I did not used tracks automation, because it is not needed. Main singing instrument has on 1 – 2 kHz frequencies sounds, which are far too loud, than other sounds, on some notes and start to cut hearing with their loudness; equalizer without automation does not fit well to them, because volume of these sounds is decreased with it in areas, where they are not on the peak. So, I used compressor to them with settings, allowing it to smoothly decrease volume of the peaks and not touch other places of instrument’s playing; all in all it worked out good.

Hybrud VST synthesizer Funxion in DAW REAPER

Then experimenting with balance of instruments volumes, so that they play in symphony and does not try to silence each other, than another small amount of strokes and tweaks and composition sounds, with subwoofer or multi-band speakers or headphones it should be completely good. That is all for today, if you have any questions, then ask them in comments to article. I already know which composition I’ll create next time, see you in the broadcast.

Rave La Marseilleise in DAW REAPER : Viva La France!

Rave La Marseilleise in DAW REAPER

Lets create today Rave variation of La Marseilleise in DAW REAPER, using the same FM synthesis, effects and tracks automation. MIDI notes I downloaded from Internet, thank you goes to their author; then added to basses accords, so that they’ll sound better and richer, for them I used preset Pentagon of hybrid synthesizer Xenobioz Funxion with effect phaser. For melody I created a couple of instruments and added to all of them small reverberation effect : first one, looking like “Non, je ne regrette rien …” ( Xenobioz Funxion preset Phonetic2 ); other one looking like tensioned string, which is plucked by one hand and being hold by the other, so that sound is short and completes fast ( Xenobioz Funxion preset Muted String ); and third one, sounding like lite electro-guitar ( Xenobioz Funxion preset Uranium ). Via this link there is ability to download completed composition in form of FLAC file and archive with project file and sounds : Rave La Marseilleise in DAW REAPER.

Hybrid VST synthesizer Funxion in DAW REAPER

Then I balanced instruments volumes, so that they’ll not try to silence each other and ‘ll not fight for the first place in composition, but played together; and added to it hasteless drums rhythm of drums and hi-hats, which plays in harmony with basses; added small amount of syncopation. Then I applied tracks volume automation, so that tracks would start and complete smoothly, without abrupt volume changes. Some amount of final strokes and tweaks and composition is ready. If you have any questions, then ask them in comments to the article, I already know which composition variation I’ll create next time, see you there!

Rave + Trip-Hop “Good night, babies” in DAW REAPER : FM synthesis and reverberation and phaser effects

Rave + Trip-Hop Good night, babies in DAW REAPER
Rave + Trip-Hop “Good night, babies” in DAW REAPER

Lets continue studying music creation and DAW REAPER learning and create Rave + Trip-Hop variation of Russian song “Good night, babies“, wherein we will use FM synthesis, reverberation and phaser effects and tracks automation. For melody and basses I used the same way hybrid VST synthesiser Xenobioz Funxion with the same presets and downloaded MIDI notes from internet ( thank you goes to original author ), removing bank selection signal from them. With tracks automation I set smooth volume increase and decrease at the beginning and end of composition, so that it does not start and end abruptly. Via this link you can download completed composition in FLAC format and archive with project file and sounds : Rave + Trip-Hop “Good night, babies” in DAW REAPER : FM synthesis and reverberation and phaser effects.

Reverberation effect in DAW REAPER

At the beginning we add MIDI notes to tracks of composition and plug in to them VST synthesiser Xenobioz Funxion with Exotic Flute and Pentagon presets for melody and basses. Then we will add to melody track built-in ReaVerb effect, which adds reverberation and makes it more volumetric, giving to it an atmosphere. It is better to not overuse it, so that melody will remain easy for perception and reverberation will not attract attention to itself. Then we add to basses track scripted effect Guitar/phaser, it is written on built in script language of DAW, so it works not so fast, as compilled VST applications, and it is better to use not much of them, so that composition playback would not lag. Phaser adds to basses “U-a-u-a-u-a-…” sound, this is especially noticeable on long basses notes and makes them not monotonous and constant, without addition of too much movement to basses. It is better to not apply reverberation to them, because basses should stay at the center of stereo picture and not jump here and there, otherwise this will draw too much attention and annoy. Then we add simple and hasteless drums rhythm with kicks and snares, characteristic to Trip-Hop music, let it accompaniment basses this time, and use syncopation, where needed, so that drums rhythm is not monotonous. Next : final strokes, and composition is ready.

Phaser effect in DAW REAPER

This is it for today, next time I’ll create variation of other composition to continue growth in this direction. If you have any questions, then ask them in the comments to article. See you next time!

RAVE “Spruce Song”, cool FM synthesis and tracks automation in DAW REAPER

RAVE Spruce Song in DAW REAPER
RAVE “Spruce Song” in DAW REAPER

Lets create today RAVE variation on Russian song “Spruce Tree Song” in DAW REAPER, using FM synthesis and tracks automation. FM synthesis is a way of sounds generation, in which frequency of source wave is modulated ( continuously changed with periods ) with other wave, in FM synthesizers a couple of oscillators is usually built in, part of which generate base waves and others generate modulation waves. We will use for this free hybrid VST synthesizer Xenobioz Funxion, it has lots of different parameters and nice-looking interface; there are lots of other hybrid synthesizers, paid ones, as well as free ones, from them I also like Kruud of the same Xenobioz and Angular Momentum Freehand. All of them can be found in Internet with search engines on KVR Audio site or on authors’ sites. Also, we will use tracks automation : it allows to control parameters of tracks ( volume, stereo panning and other parameters ) and parameters of synthesizers and effects, that are applied to tracks and define curves for their automatic changes. Via this link there is ability to download : completed composition in FLAC format and archive with project file and drums sounds.

Hybrid VST synthesizer Funxion in DAW REAPER

For melody and basses I used completed MIDI file, which I found in Internet, do not remember on which site I took it, but thank you goes to the author :-) ; disabled automatic preset choosing for tracks and added FM synthesizer Funxion with slightly modified Exotic Flute preset for melody and Pentagon for basses. Added drums sounds in tact with melody, periodically using syncopation ( in simple words : this is when drums rhythm is different from what human anticipates to hear, for example, human anticipates to hear “thump” – “thump” – “thump”, but receives “thump” – “…” – “thump”, this attracts attention and stimulates human to listen for composition with higher interest; but this should not be overused, because, if everywhere will be syncopation, then there will be no rhythm anticipation and there will be no syncopation at all ). Then added simple tracks automation for melody and basses, with smooth volume increase in the beginning and smooth decrease at the end.

This is all for today, if you have any questions, then ask them in comments to article, I’ll try to answer on them as soon, as I’ll have free time for this. Next time I’ll imagine something more and will create variation of other composition for experience gaining and skills development, stay tuned!

ESI UGM 96 external sound card testing in DAW REAPER

Sound card ESI UGM 96

Lets devote today’s audio part to detailed testing and review of external sound card ESI UGM 96 in DAW REAPER. And start with external view on card, its frontal panel has : 2 TRS ( 1/4″ jack ) inputs ( one of them is instrumental Hi-Z, second one can be switched between instrumental and linear/microphone modes, also there is ability to switch +20 dB signal amplification for it ); and right input work mode switches. Card records only mono signal by both inputs. Its back panel has 2 TRS ( 1/4″ jack ) outputs, working in linear mode and as headphones outputs, they duplicate each other and both output stereo signal; and USB port, for connection with computer and powering from it, it does not require additional power adapter input. There is no ability to plug phantom power +48 V to microphone input and card outputs and records only unbalanced signal. Body of audio interface, including frontal and rear panel, is made from aluminum; analogue connectors are nickel-plated, there are gold-plated rings on the outer sides of connectors, but they are not connected with PCB and do not conduct signal, all connectors are inside and they are nickel-plated; so, there is need to use the same plugs.

Sound card ESI UGM 96 ( rear panel )

Card works with sampling rates up to 96 kHz and 24 bits per sample precision. According to technical specifications, it has following characteristics : Hi-Z inputs ( THD+N 0,003 %, impedance 500 kOhms ), input with +20 dB amplification ( THD+N 0,003 %, impedance 2.2 kOhms ), analogue to digital converter ( dynamic range 105 dB, S/( N + D ) ratio -98 dB, channels separation 90 dB ); linear/headphones outputs ( THD+N 0,003 %, maximal output power 100 mW and 32 – 600 Ohms impedance ), digital to analogue converter ( dynamic range 103 dB, S/( N + D ) ratio -90 dB, channels separation 100 dB ); power consumption 0.85 W, current draw 500 mA maximum. It is compatible with Windows XP, Vista, 7, 8, 8.1 and 10 and Mac OS X 10.4 and newer operating systems, in the first ones it uses dedicated drivers with ASIO 2.0, MME, WDM and DirectSound interfaces support, in the second one it works via native OS drivers with CoreAudio interface support. Via these interfaces it works with modern DAWs ( Avid Pro Tools, Ableton Live, Steinberg Cubase, FL Studio, Cackewalk Sonar, REAPER and others ) and sound recording and editing programs. Package contains : ESI UGM 96 sound card itself, shielded transparent USB cable, CD-ROM disk with drivers and plugins ( among which are specialized guitar compressor and effects processor and VST instruments and effects ), DVD disk with DAW Cubase LE 5 software and user’s guide. PCB photos from both sides are at the bottom of article.

Testing of ESI UGM96 sound card in DAW REAPER

Lets move on to ESI UGM 96 testing in DAW REAPER; I tested it recording signal from inputs without plugged connectors, this way I recorded only inputs noise; and connecting card’s outputs to inputs with ground and foil shielded studio microphone stereo cable with 0.5 m length and nickel-plated TRS connectors. Testing results of right input without Hi-Z mode and +20 dB amplification switching are as following : noise level without plugged connector -90.4 dB, with plugged in main linear/headphones output -87.4 dB, with duplicating headphones output -87.8 dB, recorded level of 0 dB signal ( 1 kHz sinusoidal wave ) for main output -1.2 dB, for duplicating -2,5 dB. Left Hi-Z instrumental input ( only noise without connector ) -90.6 dB; right input in Hi-Z mode ( only noise without connector ) -89.7 dB; right input in Hi-Z mode and with +20 dB amplification : -85.8 dB. Right input in linear mode with switched on +20 dB preamplification : only noise -87.8 dB, plugged in main output without signal -67.9 dB, plugged in duplicating output -68.2 dB. Wherein there is ability to raise volume level of recorded signal on +12 dB in interface’s control panel, making so noise level of inputs goes up to -75.9 – -77.7 dB from -90 dB, while signal level raises up from -1.2 – -2.5 dB to 0 dB. So, it is better not to use this function and record signal on usual volume level and, if needed raise its level in DAW ( this way at least signal and noise volume levels will raise on the same dB amount ) or with use of external digital or analogue amplifier ( this way signal level will raise, but noise level of cards inputs will remain the same, amplifier just needs to be good ).

Control panel of ESI UGM96 audio interface

Now the most interesting : channels penetration measuring, for this I played the same 1 kHz sinusoidal wave with 0 dB volume only in 1 channel, which cards inputs do not record, and looked on recorded signal level for channel on which this signal should not be transmitted. In result for main output channel penetrated in the other one with -17.8 dB volume, and for duplicating one with -17.3 dB volume. In technical details it is specified, that DAC has 100 dB channels separation : either analogue part of card is much weaker, than DAC in this respect, or after years of use card started to leak signals so much, but fact is the fact : signal penetrates so much, that it is audible via headphones laying on the table.

Sound card ESI UGM 96 ( PCB 1 )

Conclusions about testing of USB audio interface ESI UGM 96 in DAW REAPER

Noise levels of card’s inputs and outputs are relatively low, it is better to not use software card’s input volume raising ( it is better to do this via DAW instruments during recording or after it or via external amplifier; however built in +20 dB microphone preamplifier of card is quite good and can be safely used ) and card has very high channels penetration, also, it records only mono signal. So, ESI UGM96 is more suitable exactly for mono instrumental Hi-Z or microphone inputs recording in small studio and it is not very well suited for analogue signal mixing and transmitting and for high-quality music playback ( due to high channels penetration ). Wherein it has quite low price and in value/price ratio respect is much better, than usual embeddable into computer case sound cards of Sound Blaster Audigy level, due to use of high quality digital chips and analogue components and external placement; also it can be used for recording of additional high quality audio channel in nature and on live performances. So, for its purposes card is good and worth invested money; but, if more functional and universal audio interface is needed, then it is better to buy one of Steinberg, Behringer, Focusrite, Roland, ESI itself, M-Audio, Alesis and other manufacturers production.

Sound card ESI UGM 96 ( PCB 2 )

Update of ESI UGM 96 testing in DAW REAPER from 16.5.10

Resolded microphone cable from stereo into mono and made measures with it : this way channels penetration for headphones output is a -51.6 dB and for linear output is -51 dB – this way it is much better, than with stereo cable. Here are two assumptions : either electro-magnetic interference in stereo cable with common ground is so strong, that in channel without signal it appears with such strength; or microphone input partly records signal from second channel of input too. If business is in EMI, then it is useful to use for headphones and speakers cables with channels shielding by their own separate grounds, if possible, with foil; if business is in partial reading of second channel by microphone input, then here is no need to do anything, because most microphones mostly record mono sound.

Steinberg Cubase LE – is a simplified version of more professional DAW of this company, it allows to record, play, edit and mix audio and MIDI signals on 16 audio tracks, 24 MIDI tracks, 8 instruments and 8 physicsl inputs with precision up to 192 kHz and 24 bits. In it HALion Sonic SE instrument is included and set of 18 effects, among which there are modulation, delay, equalizer and others. In package with ESI UGM 96 there are following VST instruments and effects : ESI Piano ( program synthesizer of piano with ability to control Susatin, Resonance and built-in reverberation ); ESI Compressor, Chorus, Phaser and Flanger ( according effects ); LUXONIX LFX1310 ( set of many effects ); as well as other fully functional and demonstration effects.

Company ESI was founded in Germany in 2006 year, mainly it produces audio interfaces, loudspeakers and other sound equipment. Its products are notable for high quality and acceptable prices, currently offices and facilities of company are located in a couple of countries of the world.

DAW REAPER : creating variation on Jingle Bells theme

DAW REAPER : variation on Jingle Bells theme

Let us continue studying of DAW REAPER, today we will create small variation on Jingle Bells theme. As components we will use the same drums sounds and VST-synthesizer Genobazz 2, which is created by TEK’IT Audio. You can download archive with REAPER project, all sounds files and completed FLAC file of composition via this link : variation on Jingle Bells theme in DAW REAPER. For main melody I used preset Default of synthesizer and for basses Acid Tweet Arp preset. First lets create main melody with use of MIDI notes, then copy their block needed amount of times on its track; then we will use it for basses, by copying and replicating block on their track.

Next we will add accords to main melody : they are 3 notes, which are played together; additional notes are taken through the white key from main note or already placed note, they can be located in the same octave or in different from main note. They can be chosen by the ears, so that they will sound in unison with main melody; also, there is ability to read additional information about accords and their classifications. Then we add drums sounds to composition with use of snares and hats WAV files, which we place in needed places. After arrangement of composition, it starts to sound and now there is ability to continue work on it, making it more interesting. If you have questions about creation of variation on Jingle Bells theme in DAW REAPER, then ask them in comments, I’ll answer on them as soon as I’ll have free time. This is all for today, see you in the next lessons.